Adding Community Contacts
For: Administrators
A community contact is a contact that applies to the entire community or to multiple residents within your community. For example, multiple residents may use the same pharmacy or physician – so instead of adding the same contact to each resident’s profile, you only have to add the contact to the community and then you can associate the contact to residents as needed. This also means that if you need to edit the contact information, you only have to do it one time to see changes reflected for all residents.
Adding a Community Contact
- You can create a Community Contact by adding a contact to a resident profile and then clicking the ‘Promote to Community Contact’ icon. This icon only displays if the contact added has a Contact Type that is not associated with Personal Contacts. (For example, if the Contact Type is “Son” or “Aunt”, the icon will not be available for this contact.)

- You can also add a Community Contact from the Community Contacts page, which prevents you from having to first associate them to a specific resident. Click the “Residents” menu at the top of the screen and select ‘Contacts’.
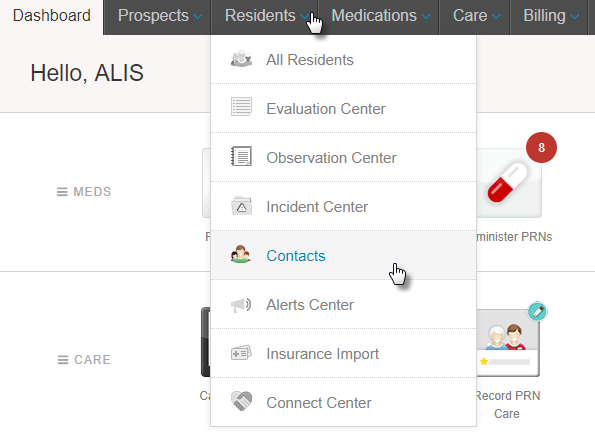
- Once on the Community Contacts page, select the community from the table at the top right.
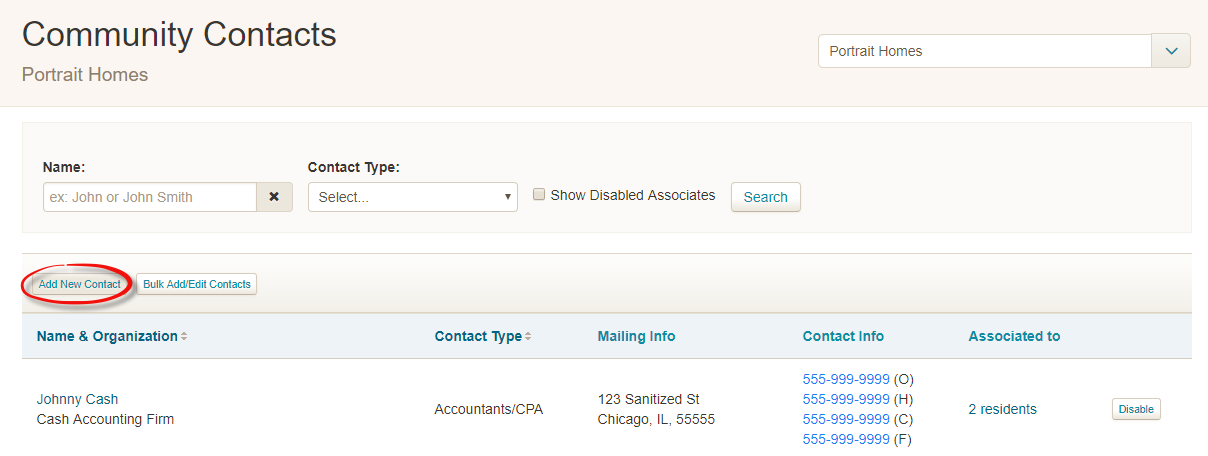
- Click on “Add new contact”
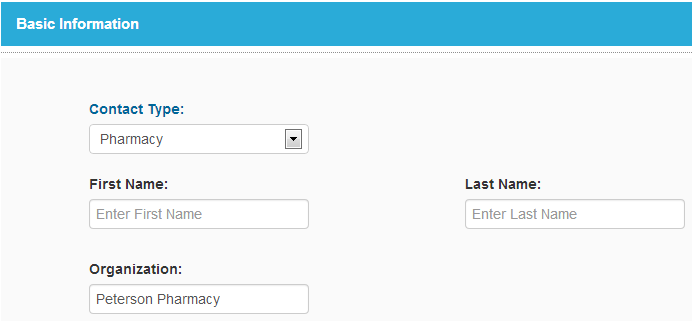
- Select the Contact Type from the dropdown menu. Add the First and Last name of the contact. Note: If it is an organization, such as a pharmacy be sure to enter the name under the “Organization” field and not in the first and last name fields.
- Once you have entered all of the contact information click “Save”.
Editing a Community Contact
- From the Community Contacts page (refer to Step 2 above), search for and click on the name or organization of the contact you would like to edit.
- Edit any necessary information.
- Click “Save” when you are done.
- Any changes made will apply to all residents to which this contact is associated.
Associating a Community Contact to a Resident
This can be done from the Resident’s profile page:
- Access the page of the resident, and scroll to the Contacts section.
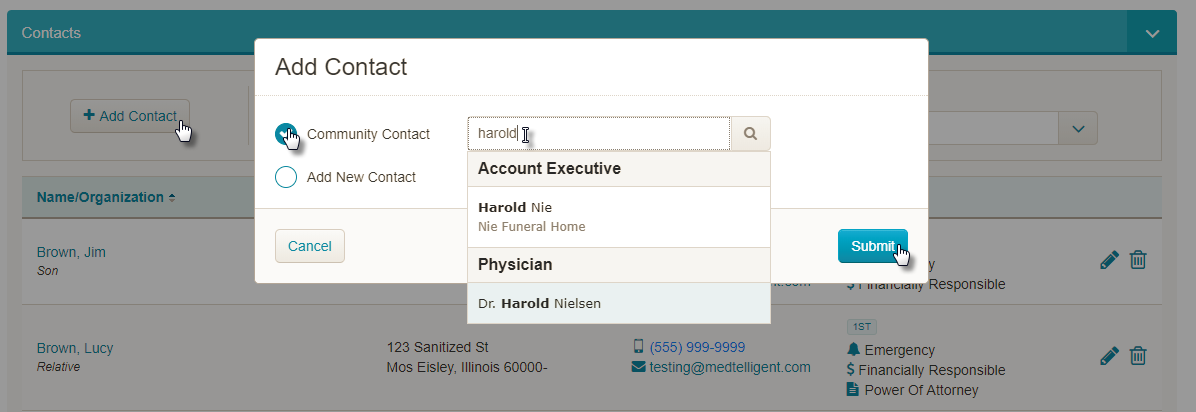
- Click the button + Add Contact. This opens a small pop-up that asks if you want to add a Community Contact or add a Personal Contact for the resident. With Community Contact selected, start typing in the name of the contact you mean to add. It will appear below for you to select and then click Submit.
- This then takes you to a page where you can make any updates to the Community Contact. You can associate the contact with a tag – for example the physician contact should have the Medical Contact tag.
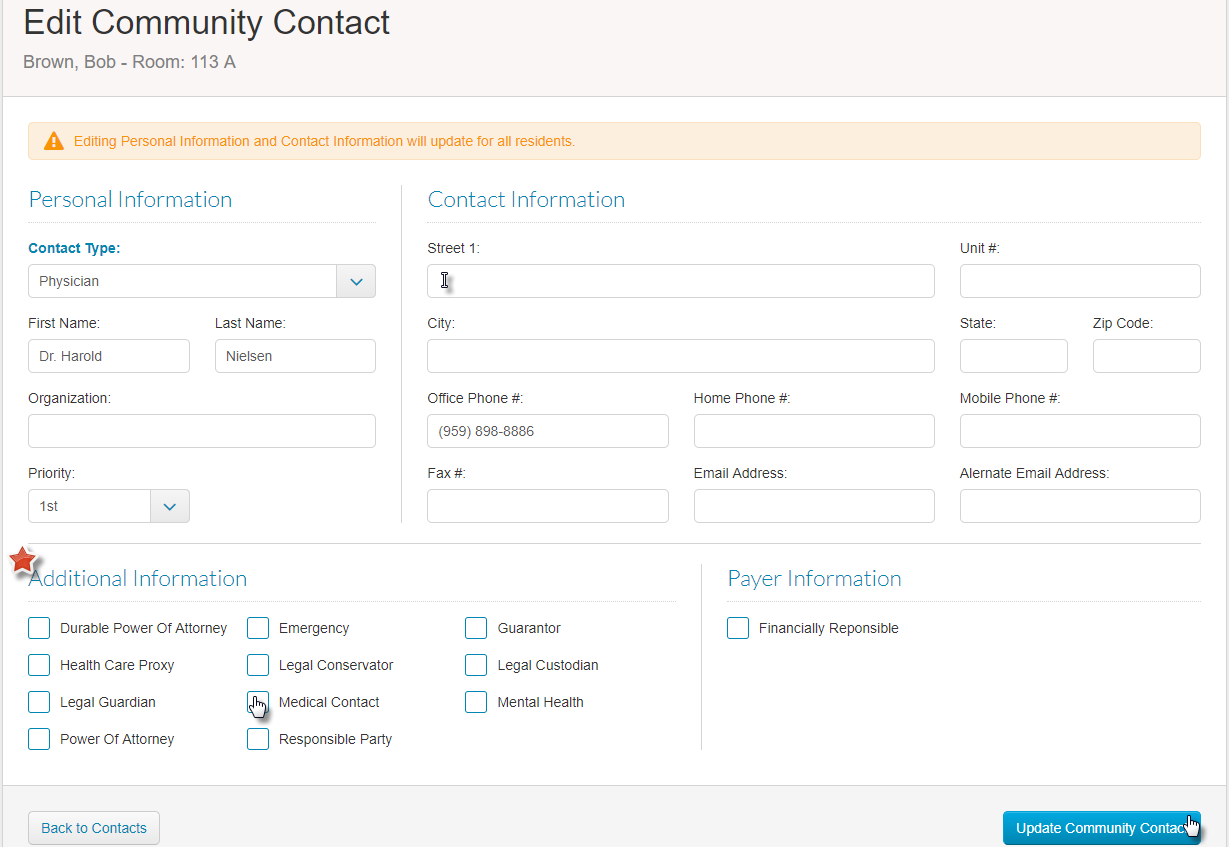
- If you make any changes, click the button Update Community Contacts. Otherwise, you can click the button on the left to go Back to Contacts for the resident.
- To delete a contact from the resident profile, simply click on the trashcan icon to the far right of the contact.
Associating contacts to residents from the Community Contacts page:
- Once you have found the contact on the Community Contacts page, click on the name of the person or organization to get to the Edit Community Contact page.
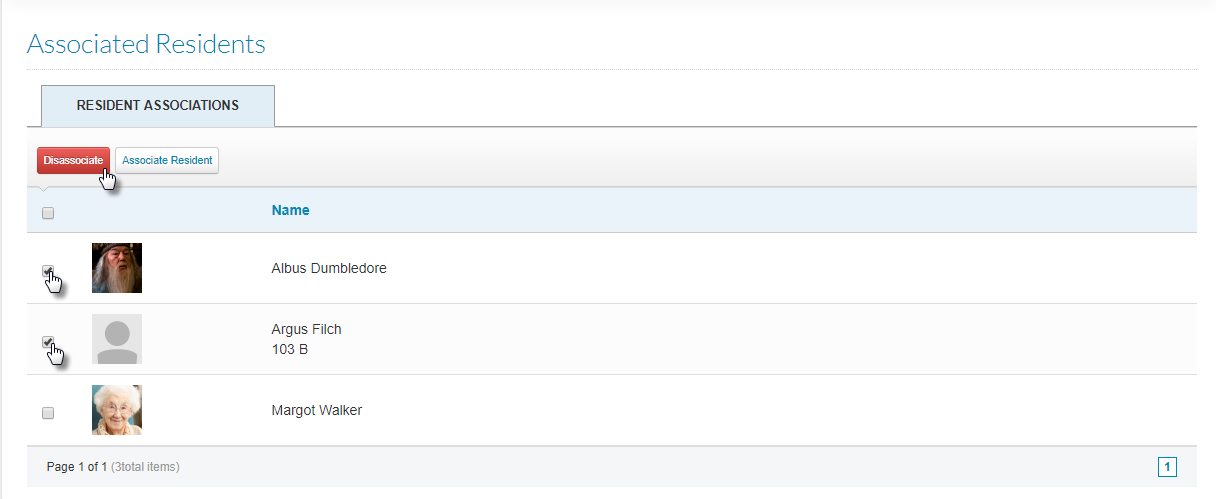
- Scroll down to the bottom section titled Associated Residents. Click the button Associate Residents.
- The pop-up allows you to select a resident and a tag if desired. Once you have made selections, click Done.
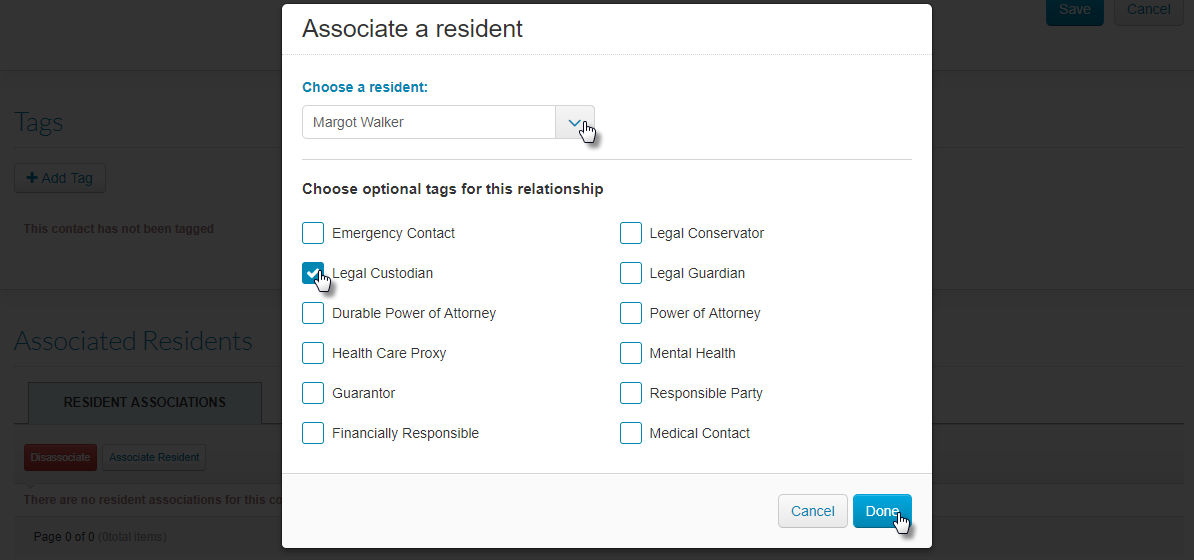
- The resident you added will then display in the Associated Residents table.
- If you need to remove this contact for multiple residents at once, click on the checkboxes to the left of their names and click the red button Dissociate.