
Transferring a Resident
For: Administrators
Transferring a resident between communities in ALIS is a three-step process.
Step 1: Initiate the transfer of the resident from the originating community. Initiating a transfer designates a resident as “ready” to be transferred.
Step 2: Complete the transfer of the resident out of the originating community.
Step 3: Move the resident and their data into the new community.
Note: At this time, Care Plans and electronic evaluations DO NOT transfer with the resident. You can always access historic versions of these on the transferred out profile.
Step 1: Initiating a transfer from the originating community
- Go to the Resident Details page of the resident.
- Click on the Change Status menu button at the top right of the page. In the menu, select “Initiate Transfer”.
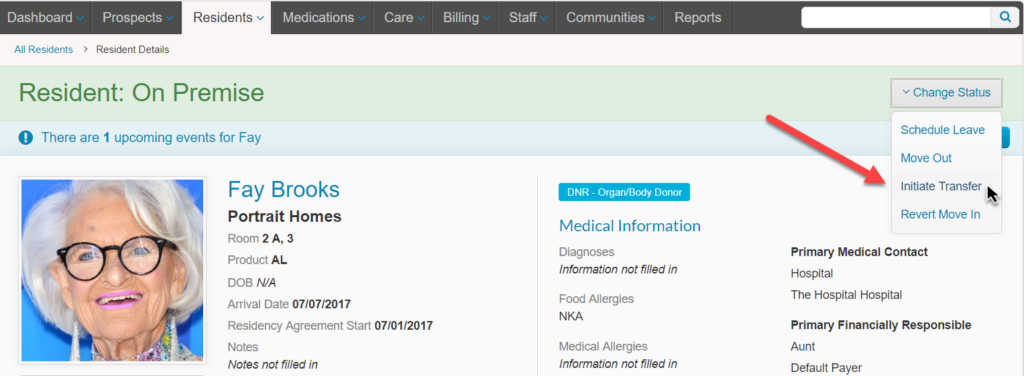
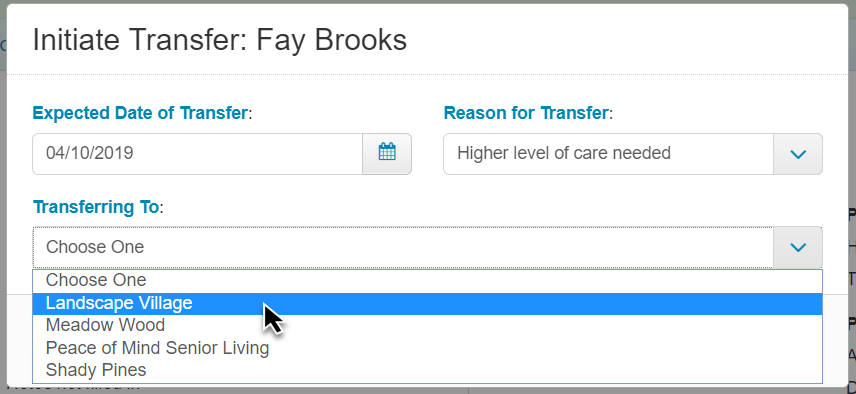
- In the pop up, update the date of the transfer, choose the reason for the transfer, and select the destination community. Click the Start Transfer Process button.
 Note: You can customize the Reasons for Transfer. Email support@medtelligent.com for help with this!
Step 2: Completing the transfer out of the originating community
- On the resident profile, a banner displays to confirm that the transfer as been initiated. To complete the transfer out of this community, once again click the Change Status menu at the top right, and select Complete Transfer.
- This opens a pane from the right side of your screen, where you must confirm the details of the transfer and impact of moving them out of the originating community.
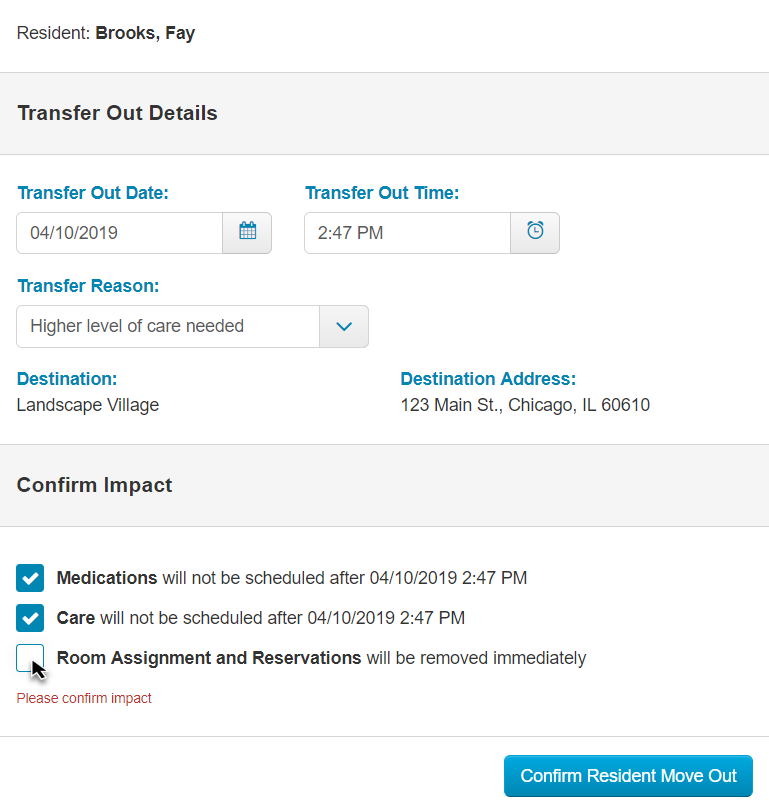
- Make the necessary selections and click Confirm Resident Move Out.
- This page is now updated so that it is clear that the resident was transferred out of the community. This is now a Transferred Out profile, and can be accessed from the Moved Out section of the All Residents page.
Step 3: Completing the transfer into the destination community
- Go to the All Residents page for the destination community.
- Once a transfer is initiated, the resident can be found in the Incoming tab:
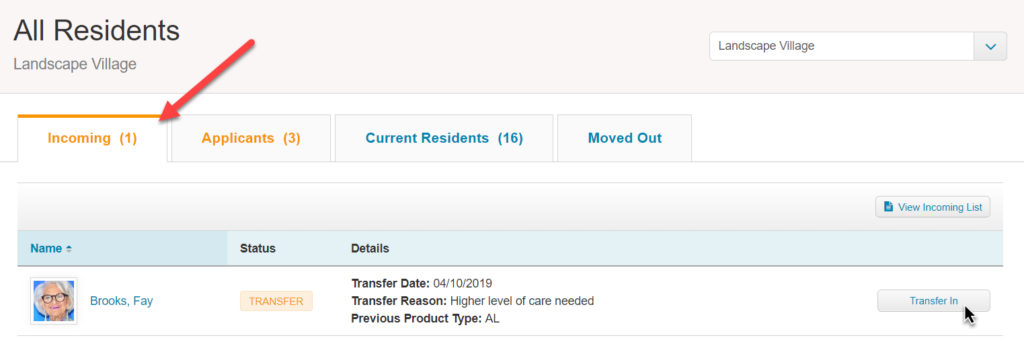 Note: If you can’t find your resident in this tab, double check that the transfer out of the originating community has been completed, and verify that you are looking at the All Residents page for the destination community.
 - Click the Transfer In button. This will open up a pop up where you confirm the resident’s Product Type and select the information to copy over from the originating community. Click Transfer In and Go To.
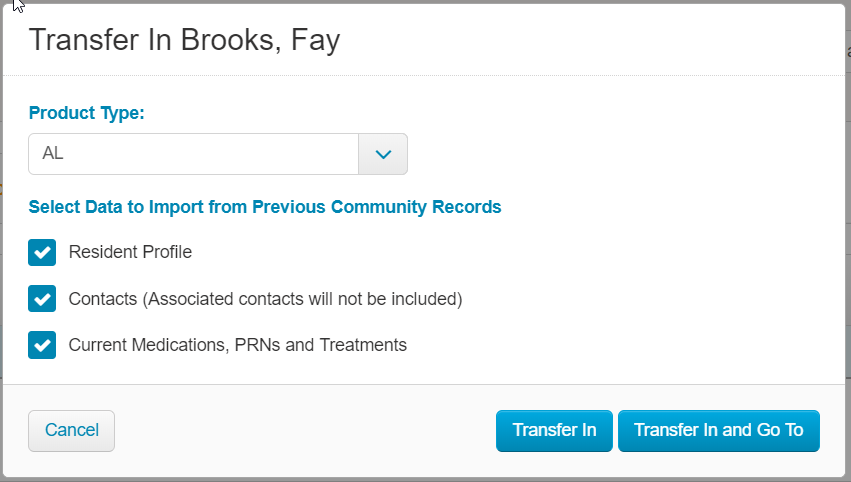
- You will then be taken to the Transfer Applicant Details page. At this stage, the resident you have transferred into your community is an Applicant, meaning they are not yet marked as being physically in your community. This means that you can fill in any additional information about the resident before they actually move in, including basic information, move-in info, room reservation, evaluation, care level, billing, and compliance.

- Notice that the Move In button is not yet available. Before we can move them in, we must review their compliance items to make sure all documentation completed on their profile in the originating community is carried over properly to this new community. Click the orange/yellow Review Compliance button to navigate to their compliance table and set this up.
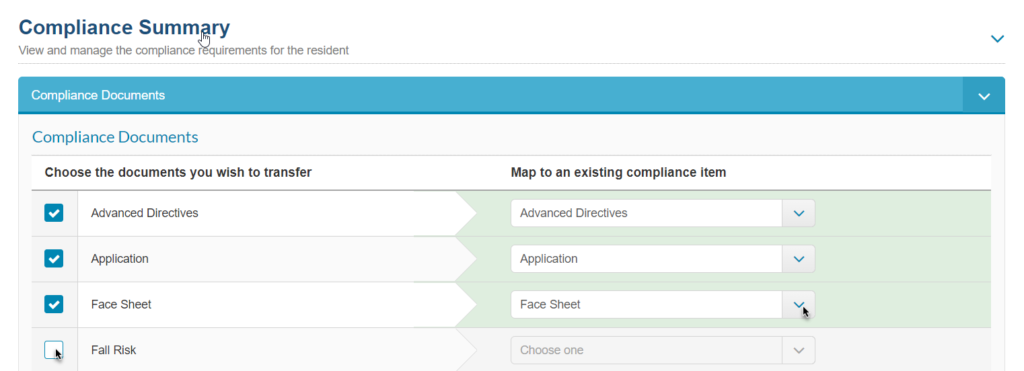
- Once you are done mapping the items from the left side of the table to the right, click the button at the bottom right that says Transfer Only Selected Documents. Once this is done, the Move In button at the top of the resident’s profile is available, and you can move them into the new community! Transfer complete.