Login Lockdown by IP Address
The option to lockdown your staff logins based on IP address is perfect if you want to prevent people from logging in when they are outside of the building.
Some FAQs first:
What is an IP Address?
In this case we are referring to your public IPv4 address. To keep it simple, this is the number that identifies your internet connection at the building. It is possible to have multiple per building if you have different routers for different areas. We can set up as many in ALIS as you need to cover the internet access in your building.
What does it mean to ‘whitelist’ my IP Address?
This means we are making ALIS inaccessible to all IP addresses EXCEPT the ones we want. This means if someone is accessing internet somewhere else (their home, their 5G phone network, the local library, etc.) they will not be able to login to ALIS. They can only login using the addresses you choose to whitelist.
How do I find my IP Address?
The easiest way to find your IP address is actually just going online and asking Google! Here is a good website where you can find the public IPv4 address your computer is using to access the internet: https://whatismyipaddress.com.
Setup in ALIS
- It is necessary for onboarding to turn on the entitlement feature for your organization.
- Once you know your IP address(es) that you need for your building, go to Company settings in ALIS. Find the section Whitelisted IPs.

- Here you can add your first IP address using the Add Specific IPs button. This opens a pane from the right of your screen to simply paste your IP there and nickname it after a specific router if you like. You can add here as many IP addresses as needed for your organization. If you are doing this for multiple buildings, you can add them all here.
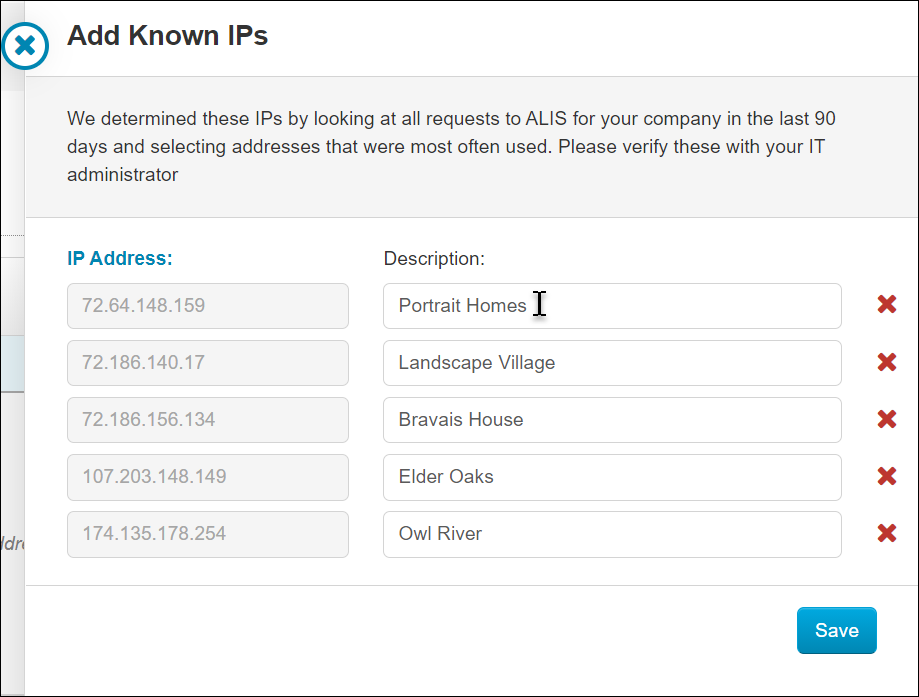
- Alternatively, we can use the Add Known IPs tool to help you find IP addresses that have recently accessed ALIS for your communities and determine which is the most common IP for each community. It is a good idea to verify that these are correct. Click Save to ‘Whitelist’ these addresses, and you can always Edit or Delete them later if needed.
- Once all IPs have been added, we want to determine if there are users who should be able to access ALIS from anywhere. For these individuals, we will update a feature on their individual staff profile. Follow these steps for each person:
- Go to the staff profile either from the All Staff page or search for their name in the top right search bar.
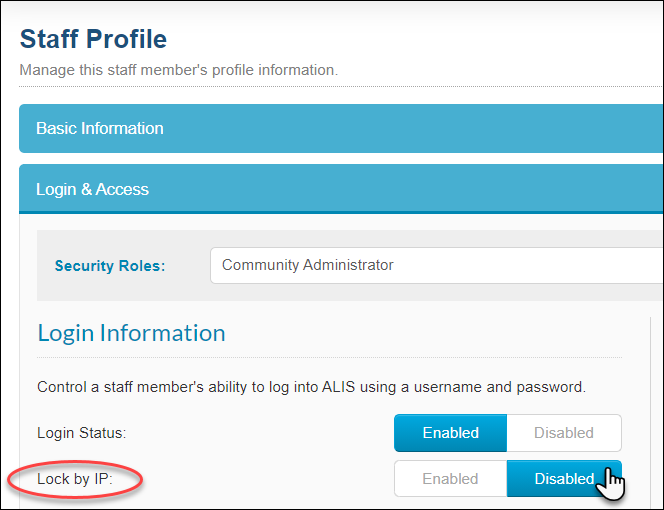
- Scroll to the blue bars and click on the second one “Login & Access”. This allows us to update the option ‘Lock by IP’ to Disabled.
- This individual will be able to access ALIS from any internet location regardless of your Company and Community Settings.
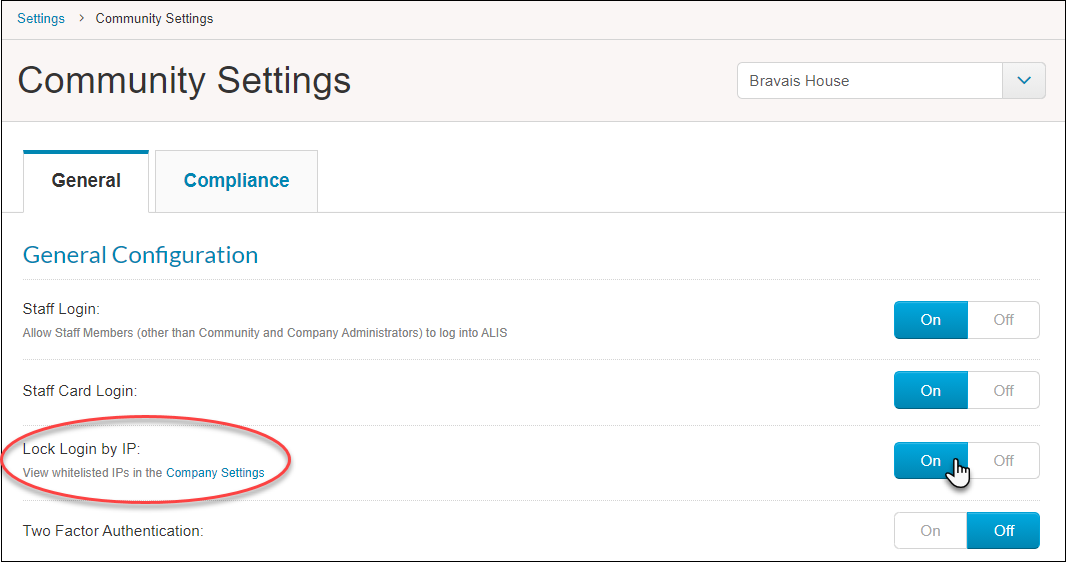
- After we have excluded any people with special permission to access ALIS outside the building, all we have to do is turn on the feature for each building. Go to Community Settings, and in the General tab, switch ‘On’ the Lock Login by IP option. Do this for each building.