
The ALIS Billing Center
The ALIS Billing Center exists to help your billing team use a list of events to track their billing and invoicing tasks. The events in the task list can be related to resident occupancy changes, level of care changes, and upcoming invoice dates.
This is the perfect way to funnel event details captured in different areas of ALIS into one place where the billing team can make informed updates to a resident billing account!
How To Use the Billing Center
Setting Up the Billing Center
FAQs
How To Use the Billing Center
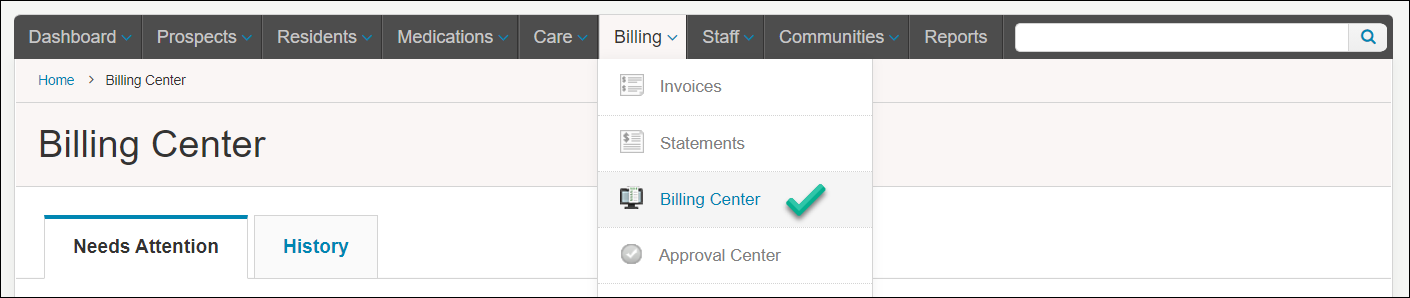
- When this is enabled for your community, you find it in the Billing menu in ALIS. If the Billing Center is not an available option, it is necessary to contact your onboarding manager or ALIS Support in order for this to be turned on and configured. If it has newly been turned on, you may want to consult the Setting Up the Billing Center guide below.
- In the Billing Center, the most noticeable figure is the number of Pending and In Progress Billing Events. This benefits us by showing how many items are on our to-do list before all residents’ billing accounts are updated.
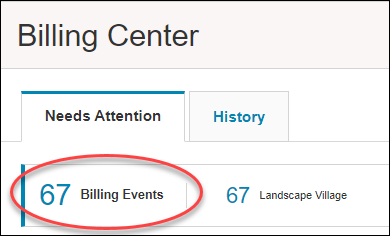
- This is the number of Pending and In Progress events for your building or portfolio of buildings selected in the Communities menu. Please notice that this number is not reflecting the date range filter, so it is very possible that there are Billing Events that occurred prior to the default filtered dates. This is especially true if the Billing Center was turned on long before your team began to use it.
- If you have items here that are old enough to be irrelevant, contact your onboarding manager or ALIS Support to remove obsolete items so you can start fresh.
- Use additional filters to show you more specific groups of events if that will help organize your workflow. Also, you can click any of the column headers in the table to sort the displayed events.
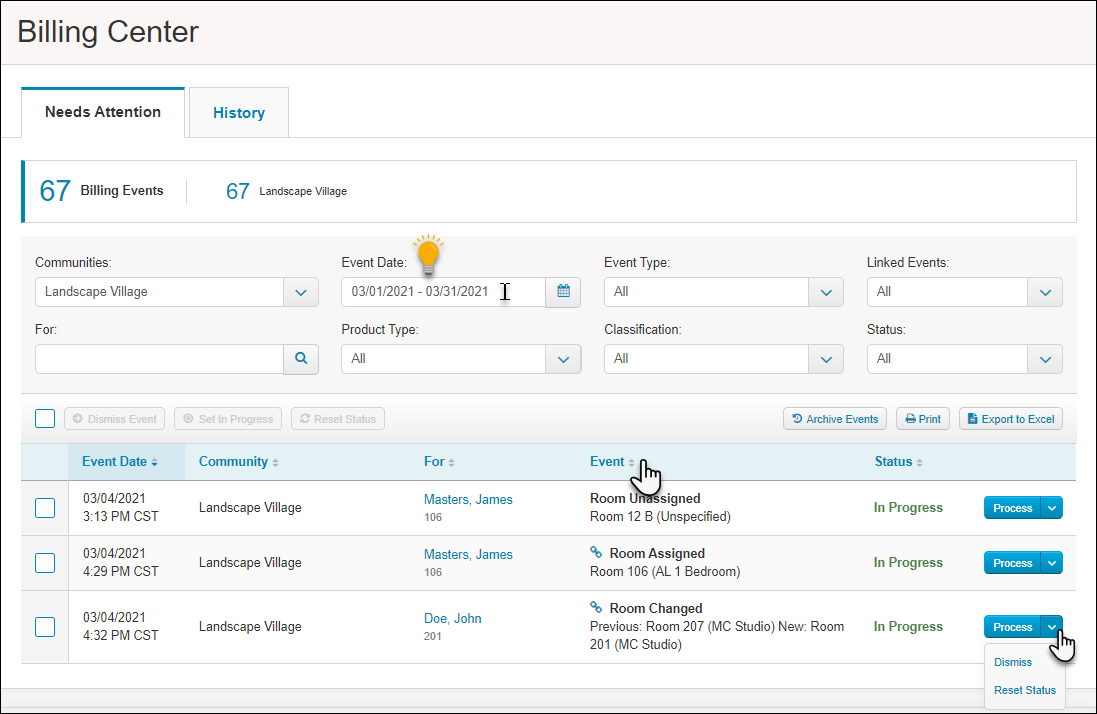
- We can choose to Process, Set In Progress, or Dismiss the events. If an event has been Set In Progress, you can Reset Status to change it back to Pending.
- Use the buttons on the far right column to choose the option for an individual event.
- If you want to Dismiss, Set In Progress, or Reset Status for multiple events, click the checkboxes to the left of the events, then click the button above the table on the left.
- It is appropriate to Dismiss if an event is truly irrelevant and does not require any billing account changes.
- Set In Progress if you want to designate an event as something you are working on. This is especially helpful if multiple people are working from the same list of events in the Billing Center! If an event has been Set In Progress, you can Reset Status to change it back to Pending.
- Click the Process button in the far right column when you are ready to review details of the event and update the resident’s billing. This takes you to a new page.
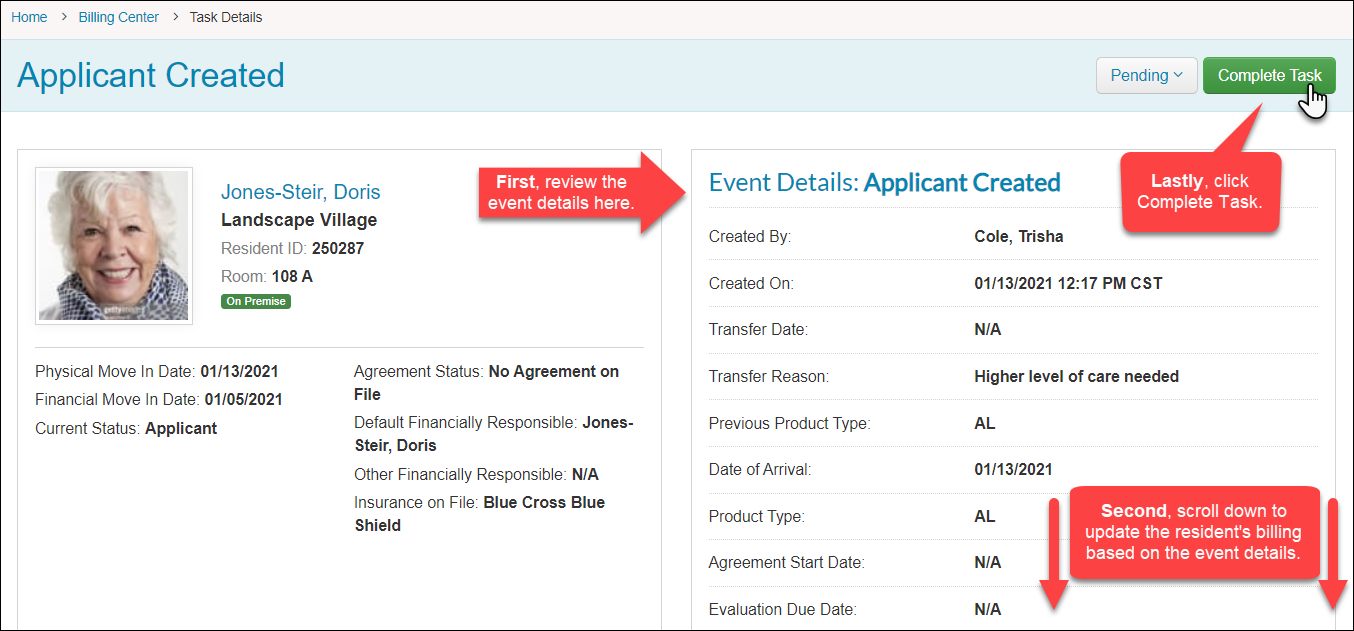
- Dependent on the event type, the top half of the page will show the resident information and the Event Details. The second half of the page gives us all the options we need to add and update recurring charges, as well as payments, credits, discounts, refunds, etc. We can even create an invoice right from this page. These options reflect exactly the Billing portion of a resident’s profile.
- Once you have completed the required billing task based on the event, scroll back to the top and click the green Complete Task button.
- Repeat this process until there are no more events in the Billing Center!
- Additionally, the Billing Center has a Print option, which may help you to generate a printer-friendly PDF you can use to keep track of things on paper. Some of us prefer to work this way and ALIS makes it easy! We also have an Export to Excel option, which may help us to communicate these details to other people on our billing team prior to Processing or Dismissing the tasks.
Setting Up the Billing Center
It may be easiest to discuss these details with your onboarding manager or the ALIS Support team. The following guide walks you through the settings in the most efficient order!
1 – Decide which events will trigger an item in the Billing Center
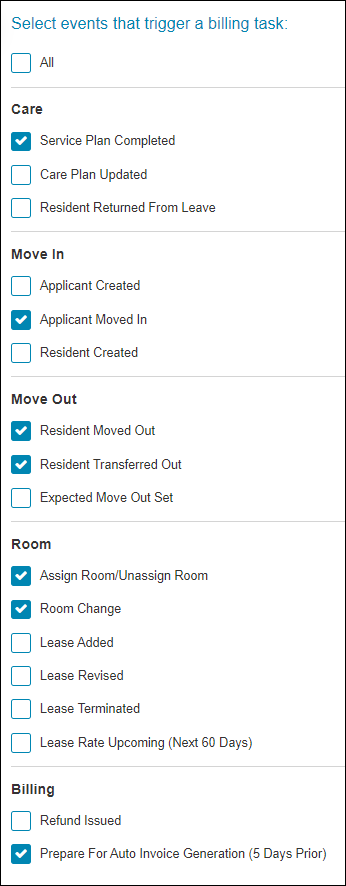 We have a lot of flexibility with the events will display for review in the Billing Center, and to get started, it is recommend you decide which if not all events will be appropriate for your billing team to review.
To update this list, go to Settings > Billing Center, and click the Manage button to the right of your community.
It is recommended to start with the following events when you are trying out the Billing Center:
- Service Plan Completed
- Applicant Moved In
- Resident Moved Out
- Resident Transferred Out
- Assign Room/Unassign Room
- Room Change
- Prepare For Auto Invoice Generation (5 Days Prior)
Based on the events that are right for you, follow the steps below to review the additional settings in ALIS:
- For the Service Plan Completed event, you want to verify details in section 2.
- For the events in the Room section, verify details in sections 3 and 4.
- The Prepare For Auto Invoice Generation (5 Days Prior) event will depend on your Billing Day of the Month in Billing Settings.
- Other events are not influenced by specific settings.
2 – Care Levels in the Billing Center
Care Levels in ALIS are determined by the RET (Resident Evaluation Tool), and any accumulated points in the Evaluation and Service Plan will determine the resident’s Care Level upon completing the Service Plan. Learn more about the ALIS RET (Resident Evaluation Tool) here.
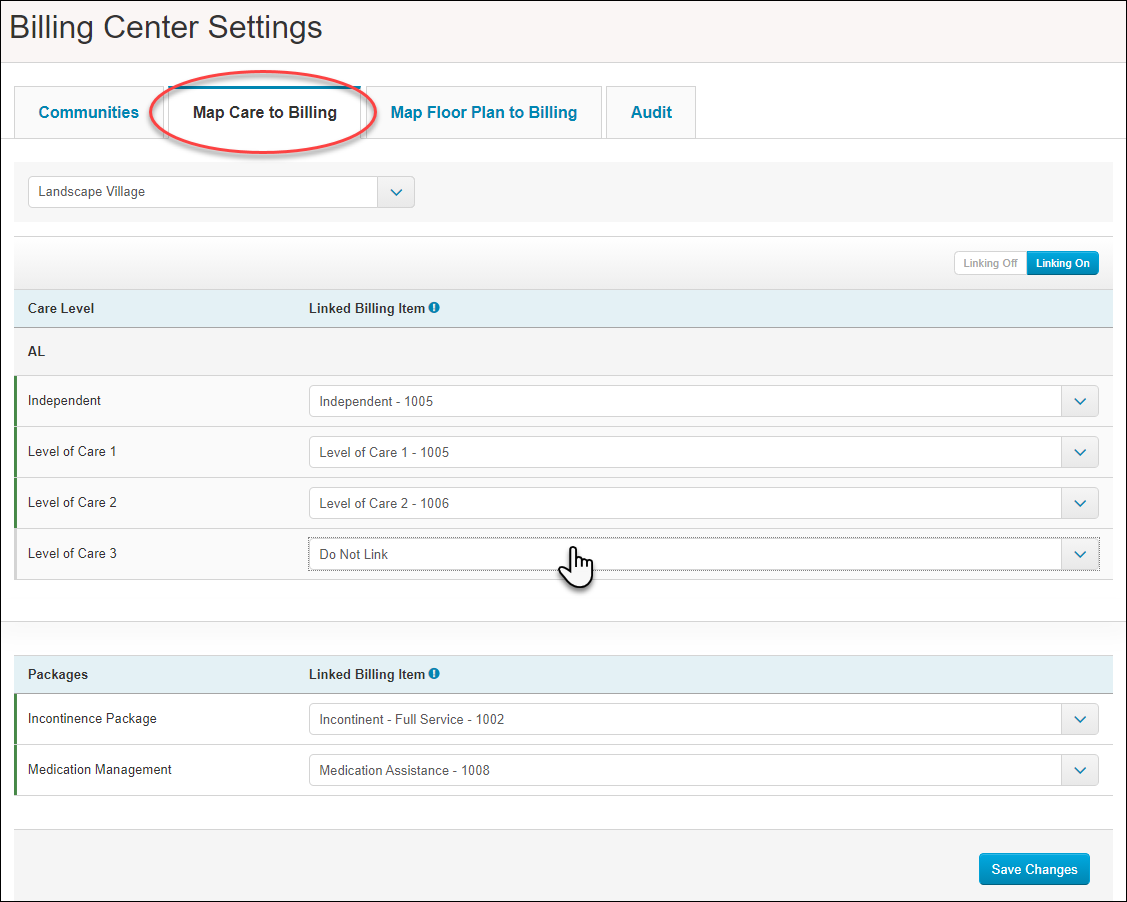
- In Billing Center Settings (Settings > Billing Center), click on the second tab Map Care to Billing.
- Verify that the correct Community is selected, and then as you scroll, you can see each Care Level and Care Package that are already active as part of the resident evaluation. If your Care Levels or Care Packages are not correct for your building, update these by following step 2 below.
- For each Care Level or Care Package, you must either leave the Linked Billing Item menu to its default “Do Not Link” setting, or select the correct corresponding Billing Item. If your Billing Items are not correct for your building, update these by following step 3 below.
- Once all the correct Care Levels are linked to the correct Billing Items, click the “Linking On” option to the top right of the table.
- Click Save Changes at the bottom right.
- Updating Care Level and Care Package settings:
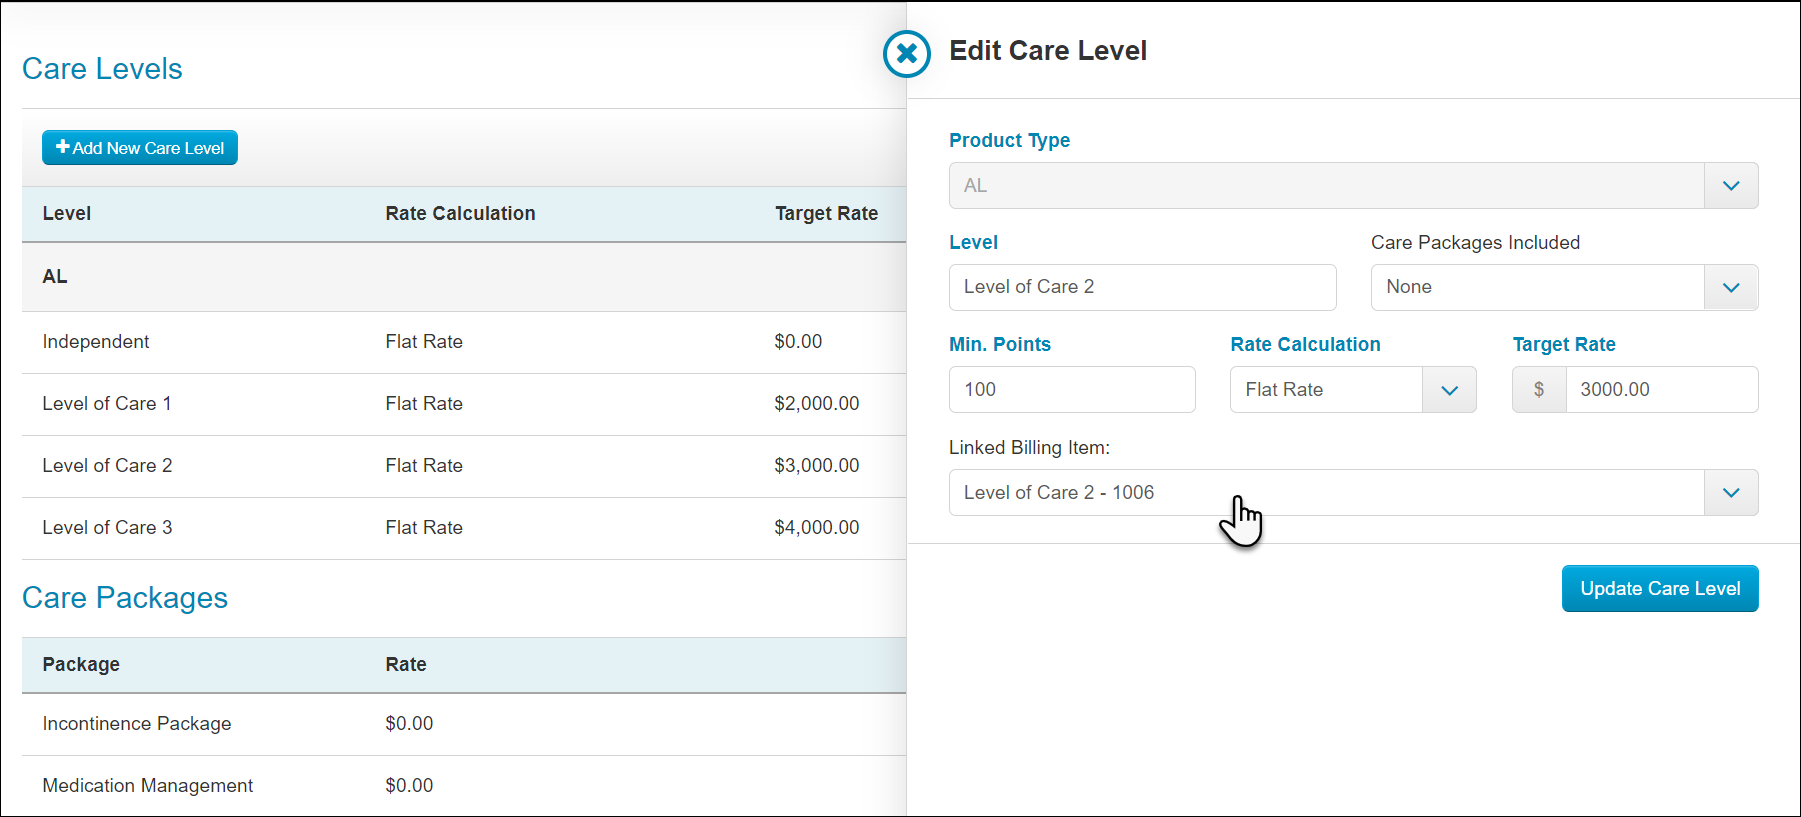
- Go to Settings > Resident Evaluation Tool Settings. Click the Reasons and Care Levels tab fourth from the left.
- Toward the bottom of the page is where Care Level names, fees, and point ranges can be added and edited. Take the opportunity to make sure these Care Levels are correct for your residents.
- If the Billing Center is already enabled for the community you are setting up, you can add the appropriate Billing Item when you add or edit a Care Level.
- We can also do this for Care Packages in the next tab to the right. Learn more about RET Care Packages.
- Finish step 1 above.
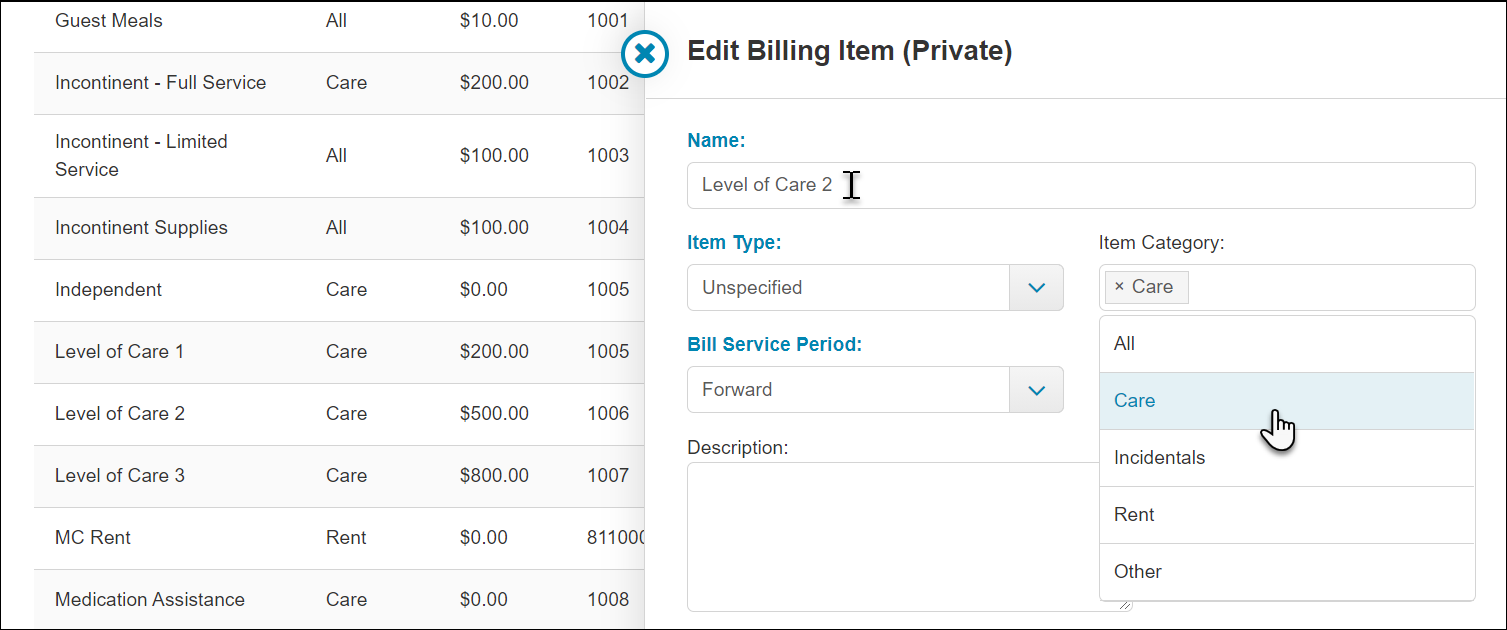
- Updating Billing Items:
- Go to Settings > Billing Settings. Select the correct Community at the top right, and then in most cases, you want to update Billing Items in the Private tab. If the care charges are invoiced to Insurance, Medicare, or other payer types, find them in those tabs.
- The Billing Items that pull into the correct Care Level menus must all have the ‘Care’ Category assigned. When you +Add Billing Item or if you click Options > Edit for an existing Billing Item, the Item Category must have ‘Care’ selected.
- Finish step 1 above.
3 – Verify Floor Plan Settings and Current Room Assignments
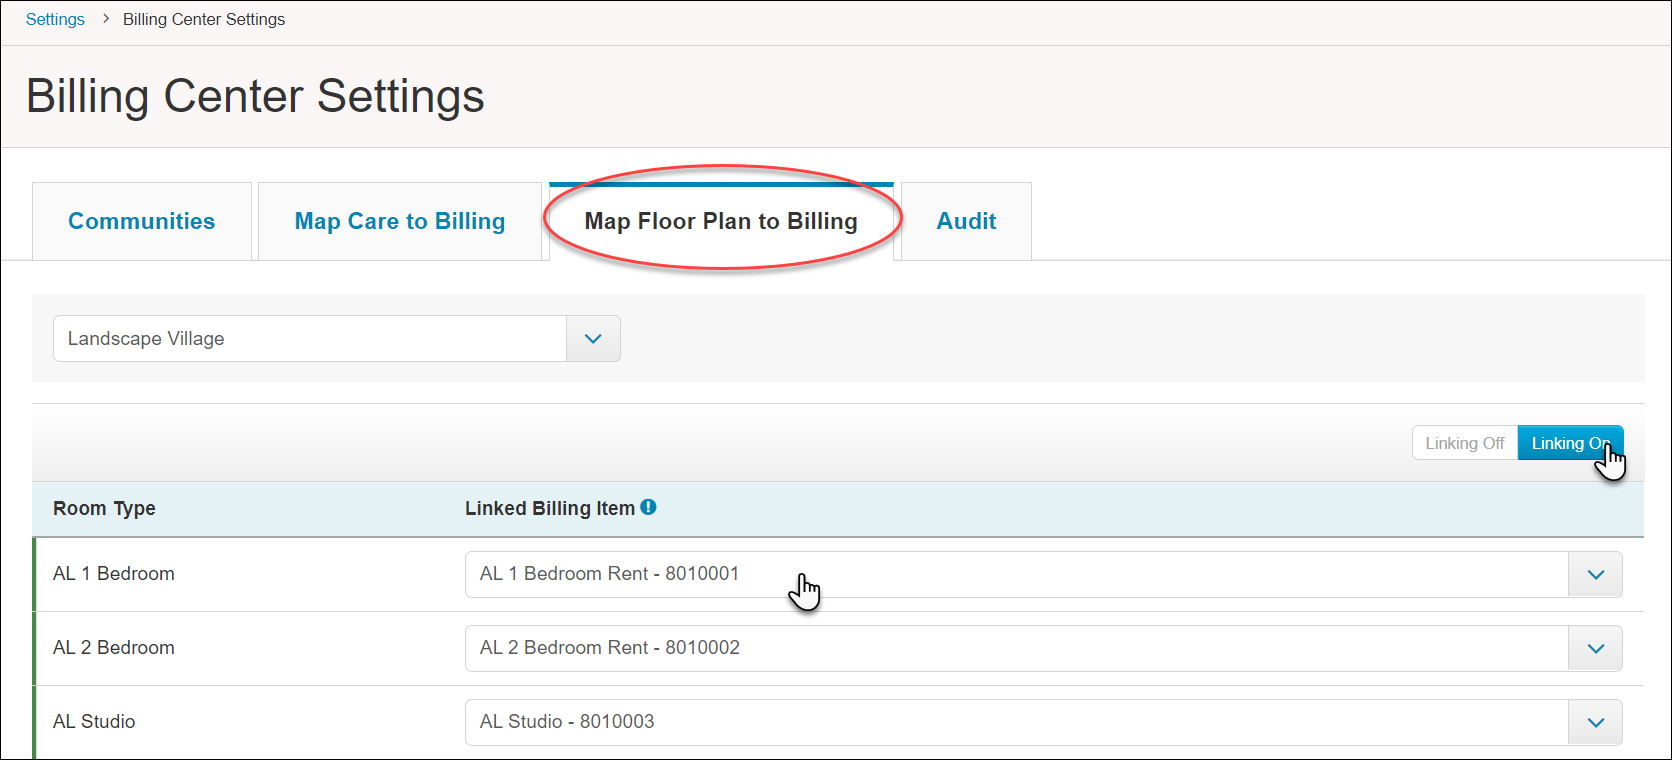
- In Billing Center Settings (Settings > Billing Center), click on the third tab Map Floor Plan to Billing.
- Verify that the correct Community is selected, and then as you scroll, you can see each Room Type that is already active in the ALIS Floor Plan. If your Room Types are not correct for your building, update these by following step 2 below.
- For each Room Type, you must either leave the Linked Billing Item menu to its default “Do Not Link” setting, or select the correct corresponding Billing Item. If your Billing Items are not correct for your building, update these by following step 3 below.
- Once all the correct Room Types are linked to the correct Billing Items, click the “Linking On” option to the top right of the table.
- Click Save Changes at the bottom right.
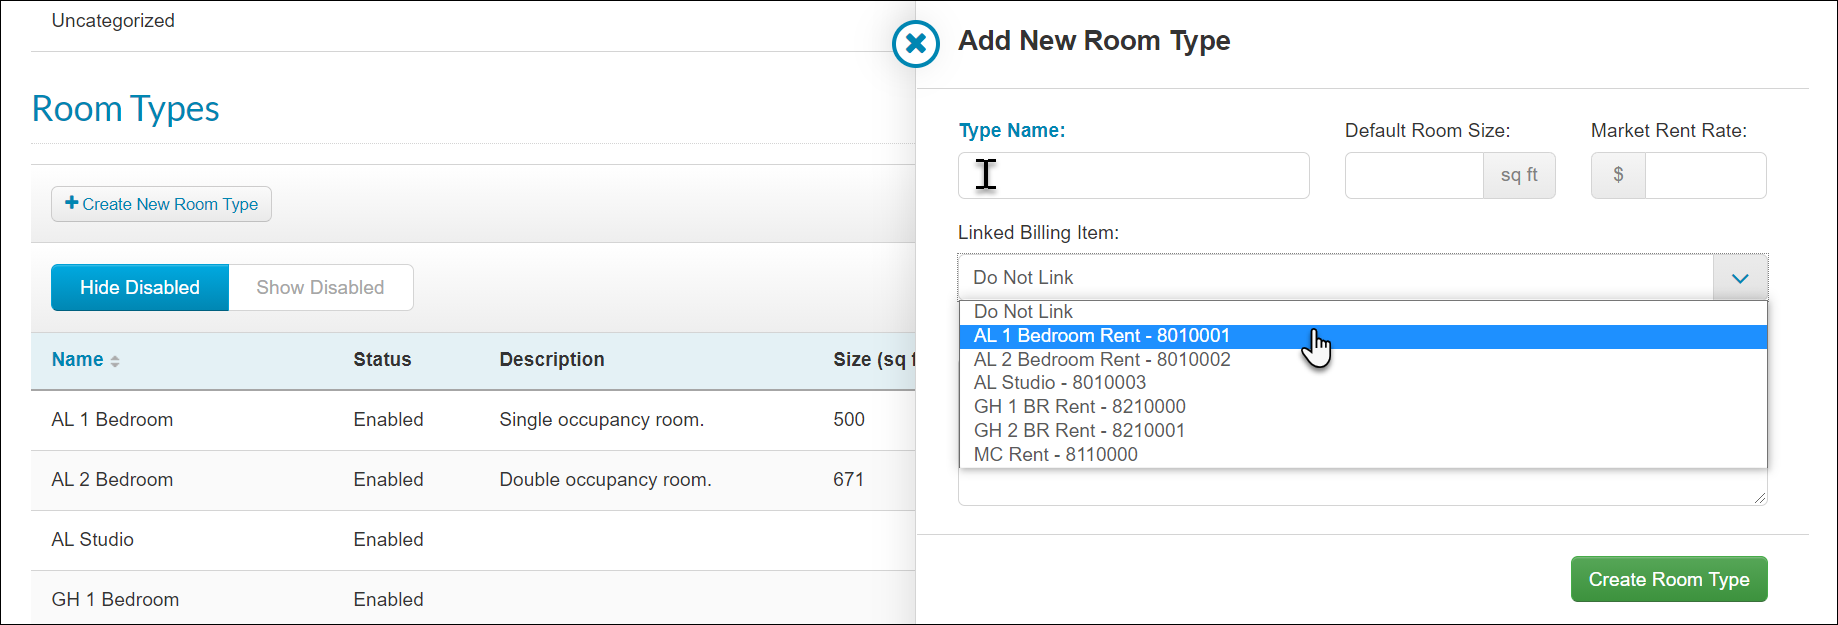
- Updating Floor Plan and Room Types Settings:
- Go to Communities > Floor Plan.
- Click the Settings tab (third from the left) and scroll down to the Room Types section. Here we need to either +Create New Room Type or use the edit pencil on the right column of the table to edit existing room types.
- If the Billing Center is already enabled for the community you are setting up, you can add the appropriate Billing Item when you add or edit a Room Type.
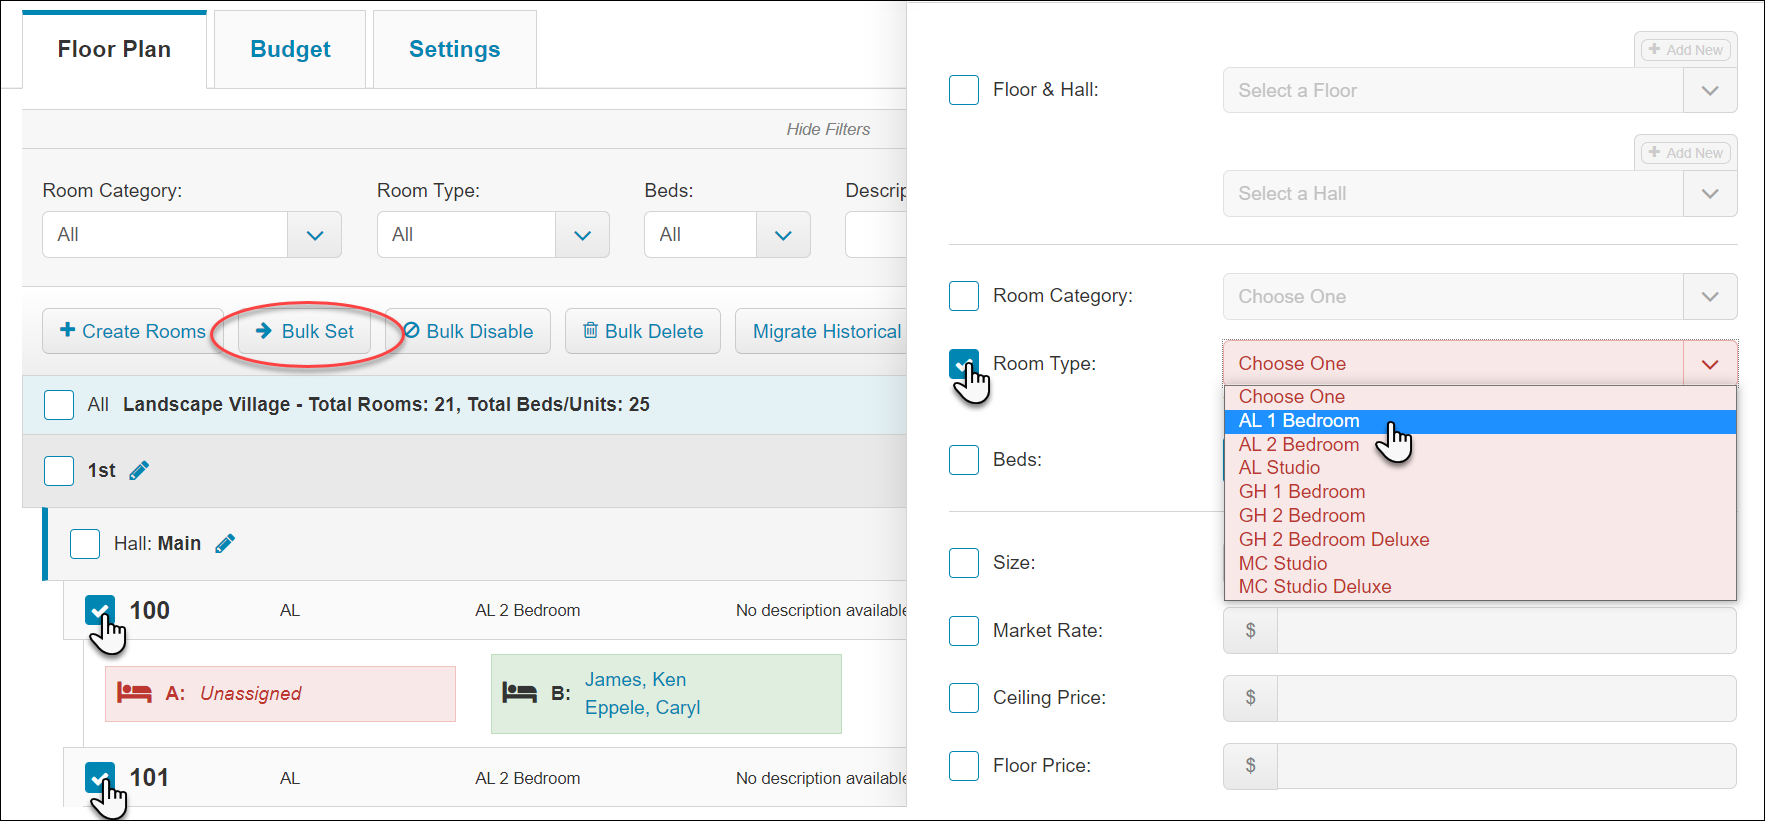
- The Floor Plan tab will show you all floors, hallways, rooms, and beds currently set up for your building. If you need to make changes here, follow this guide to edit these details.
- Each room must be assigned the correct Room Type as configured in the Settings Tab. This is most easily done by clicking the checkboxes of each room of a specific type and then using the Bulk Set button at the top to set the Room Type. Repeat this until the Room Types are accurate for each room.
- Finish Step 1 above.
- You should verify that all resident room assignments are correct. This can be done by just looking on the Floor Plan page or using the Print or Export to Excel options. The Room Assignments Report will also give you this information (Reports > Occupancy and Census Reports > Room Assignments).
4 – Residency Agreements
You will need to enable and keep updated ALIS Residency Agreements in order to use the following event tasks in the Billing Center:
- Lease Added
- Lease Revised
- Lease Terminated
- Lease Rate Upcoming (Next 60 Days)
Residency Agreements in ALIS give us the ability to:
- Plan rent increases and approve them according to a schedule
- Track invoiced rent based on the agreements
- See which units are vacant and for how long
This first must be turned on by ALIS Support or your onboarding manager. Additional details for setting this up are outlined in this article.
More information about ALIS Residency Agreement Management here.
FAQs