Managing ALIS alerts
For: Administrators, Nurses
-
It is possible to read alerts from the Alerts Center in ALIS, your email, and text messages on your phone.
-
All events that create alerts are grouped into Categories created from your Alerts Settings page.
-
Setting up alerts for yourself or a staff member is done by choosing from a list of Categories and selecting where the alerts can be read.
-
Our Support Team or your Onboarding Manager can always help with setting up your Alerts Categories, and administrator users can also make updates from Settings.
Managing your staff’s alerts:
- Access the staff member’s profile
- Scroll down to the Settings section, and click the blue bar to open the section called Alert & Notification Preferences
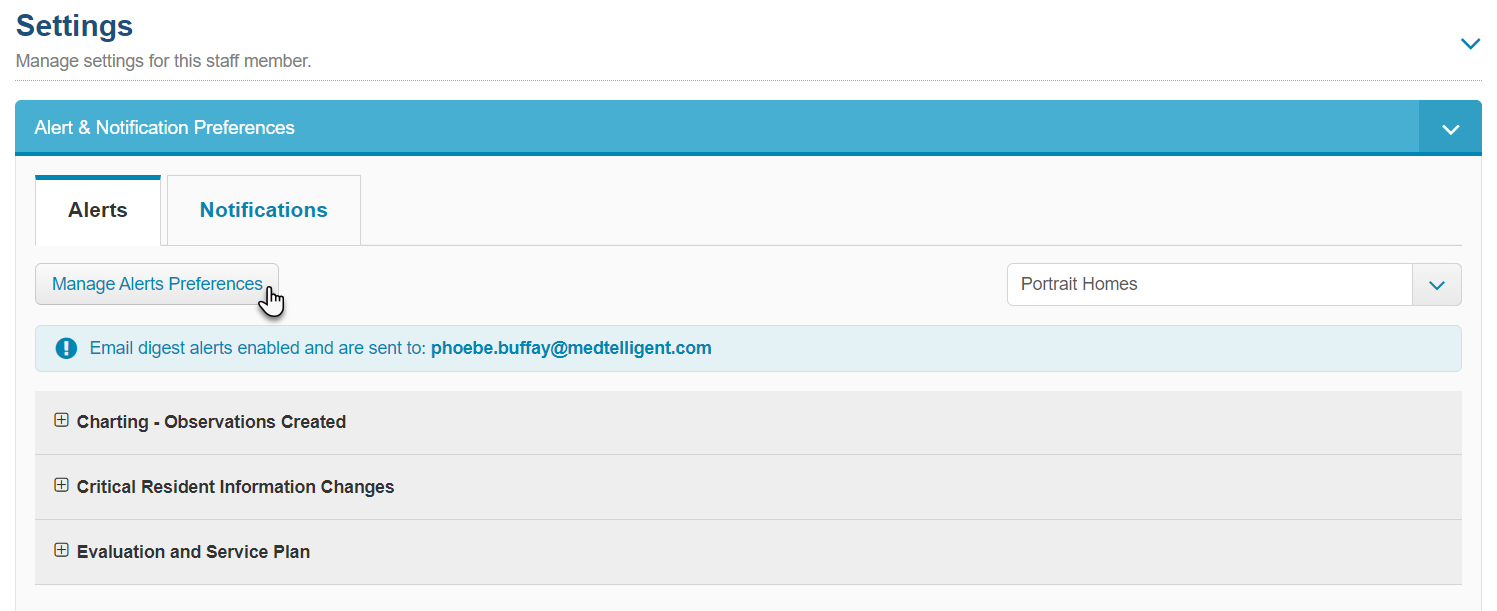
- Click on Manage Alerts Preferences
- In the pane that opens from the right, leaving the top checkboxes blank will allow them to see alerts only in the Alerts Center in ALIS. You can check the options for them to receive the alerts as individual emails, or you can select Send as Digest so that they will receive one email each day containing all of the previous day’s alert events. There is also the option to send them text messages for each alert event. Use this option with discretion!

- To set which alerts they will get, click on the Categories available under Alert Subscriptions. There may be custom categories within the main categories, and these contain a more refined list of alert events for your staff to receive.
- Click submit at the bottom right of the pane, the staff member will begin receiving alerts according to the options you selected.
Managing your own alerts:
- Access your My Account page
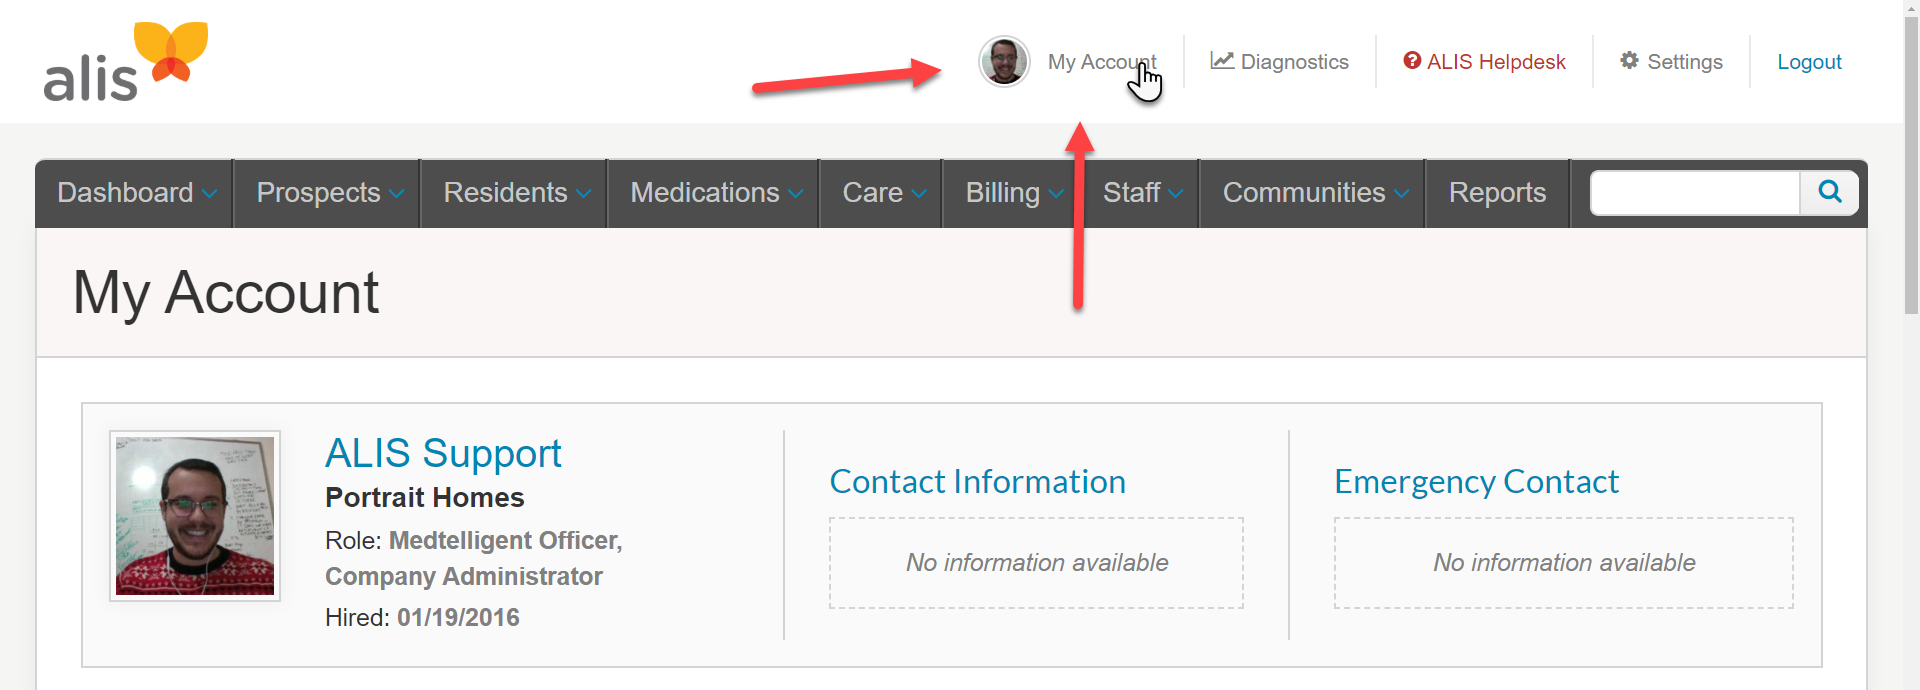
- Click on the Preferences tab
- Click on Manage Alerts and Preferences
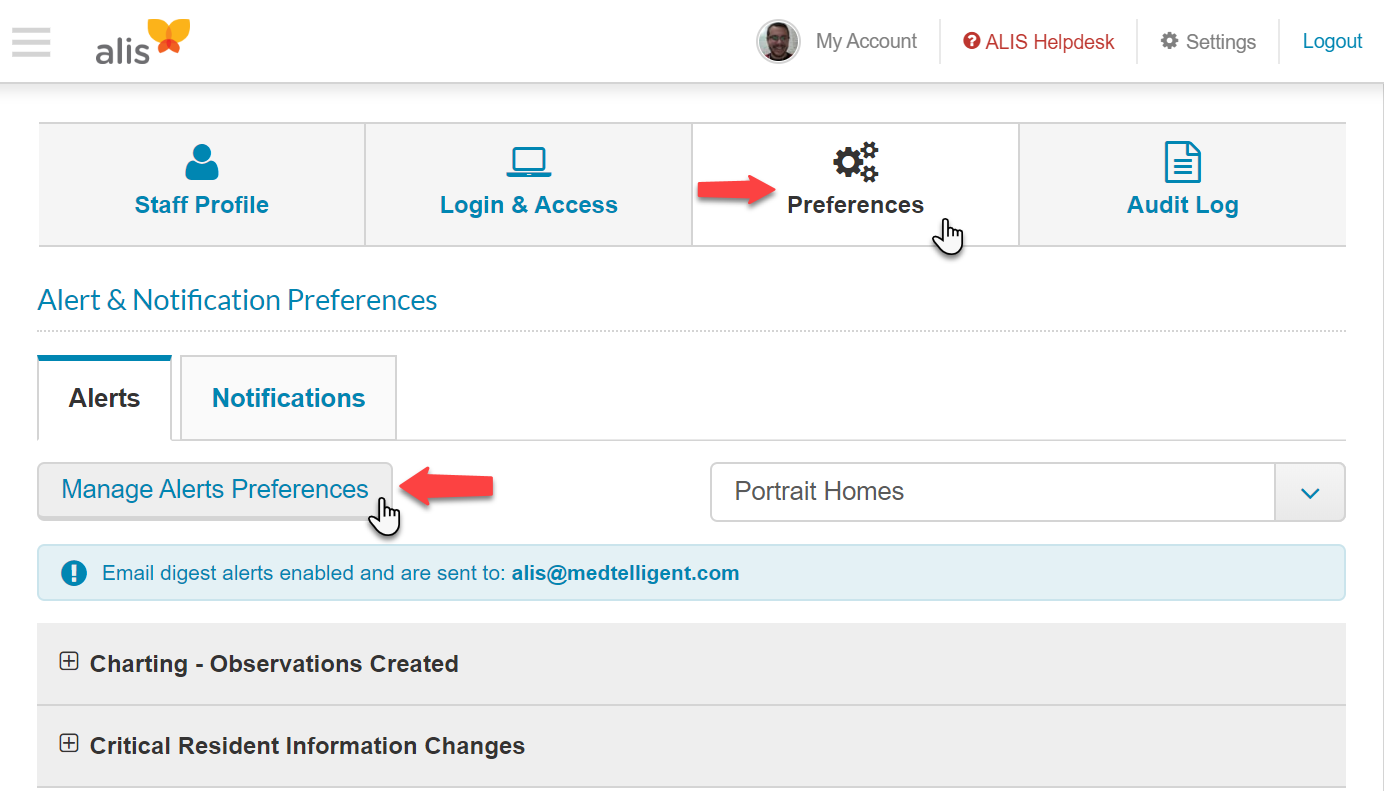
- In the pane that opens from the right, leaving the top checkboxes blank will allow you to see alerts only in the Alerts Center in ALIS. You can check the options to receive the alerts as individual emails, or you can select Send as Digest so that the alerts come in one email each day containing all of the previous day’s alert events. There is also the option to receive text messages for each alert event. Use this option with discretion!
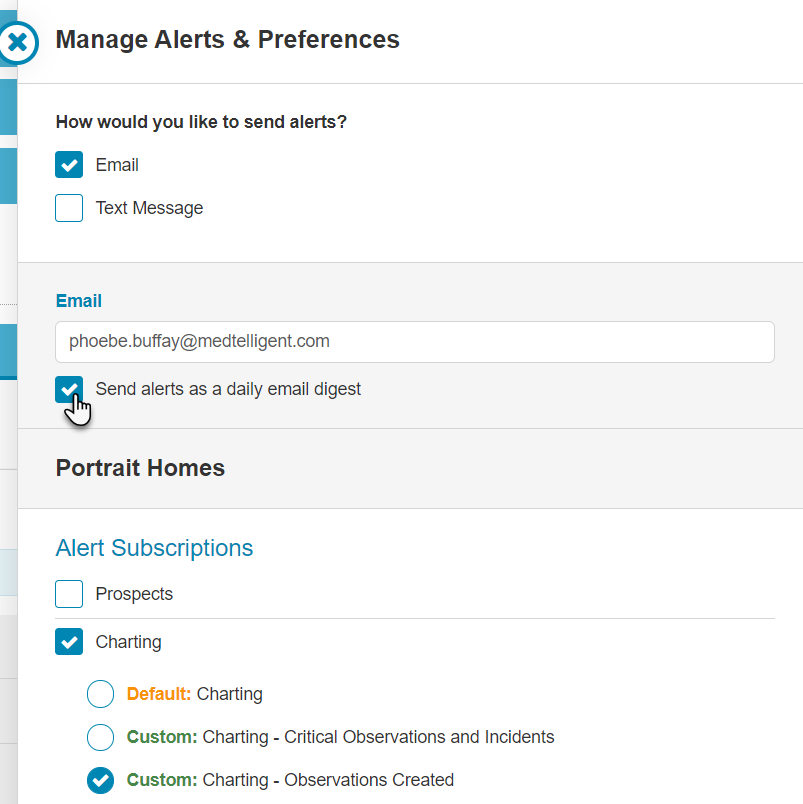
- To set which alerts you will get, click on the Categories available under Alert Subscriptions. There may be custom categories within the main categories, and these contain a more refined list of alert events for you to receive.
- Click Submit at the bottom right of the pane, and you will begin receiving alerts according to the options you selected.