
ALIS Pay
Welcome to the ALIS Pay guide! Here we outline the steps that will allow your billing team to process your ACH and credit card transactions while applying the payments to your resident accounts. It is necessary to contact your ALIS Onboarding Manager to get started.
What is ALIS Pay?
- ALIS Pay is a payment gateway feature within ALIS that allows us to utilize a third party software for processing your ACH pulls and credit card payments.
- Some benefits to using ALIS Pay:
- The ALIS Pay experience aims to save you time and effort, and never takes you outside of ALIS to complete the payments.
- Complete your Payment submissions in ALIS with the deposits themselves in one step.
- Resident payers can complete their payments themselves through ALIS Connect.
- Support from the ALIS team ensures reliability and responsiveness to your questions.
- Key details of using ALIS Pay:
- This service does not facilitate automatic payments. All payments are completed by an administrator in ALIS, or by the payers themselves within ALIS Connect.
- The setup for ALIS Pay occurs at the community level. Each community in ALIS needs its own application and Merchant Account.
1 – Application
This application allows ProfitStars (the above-mentioned third party software) to process your payments. You will never need to work with anyone outside the ALIS team or login anywhere else to setup your ProfitStars account.
That said, if you want to check the status of your transactions, you can check the progress of your deposits and see additional information by logging into their portal called CardPointe. Your onboarding manager will help you with the CardPointe login.
- Once you let us know you would like to use ALIS Pay, we will send you the application with a cover letter that helps guide you through filling it out.
- The ideal process for filling out the application is to fill it online in a PDF software (such as Adobe Reader), and when your team is ready to sign it, print the completed document and sign on paper.
- Required addendums include signed applications and bank statements, and optional addendums are driver’s license and business license. It is possible to submit without the optional addendums, but ProfitStars may reach out to request these items if they are not initially included.
- Fees: There is a per-transaction cost ($0.50), an application fee ($60 per community), and a monthly fee ($6 per community).
- For credit cards, specific fees should be discussed at the time of application. The usage fees must be paid by the community, and there is no way to transmit this fee to the payer. It is possible to invoice a “convenience fee” for credit card transactions, but by federal law this must be the same amount regardless of the transaction amount.
- If you are setting up ALIS Pay for multiple communities, each needs their own application. It is recommended that you send all applications at one time, but if you choose to do this in multiple steps, all accounts can be linked for you to access with a single login in CardPointe.
- Once you are sure all fields are filled out and all signatures are present, send the application(s) to ALISPAY@medtelligent.com.
- It currently takes 4-7 business days for an application to be approved and for credentials to be provided for us to set up the gateway in ALIS.
- Once the application is processed through the third party, we will apply their credentials to your ALIS installation. Once we let you know this step is completed on our end, you can begin step 3 in the next section!
2 – Set up resident payers and their ACH/Credit Card details in ALIS
If you want to work on this while your application is processing, it is a good idea to complete the first two steps here. Also, keep in mind that it won’t be possible to add the payer’s bank account or credit/debit card information until the application is processed, but it is worthwhile to gather those details in the meantime.
- Determine a day or days of the month when you plan to do the ACH pulls and Credit Card charges from payer accounts.
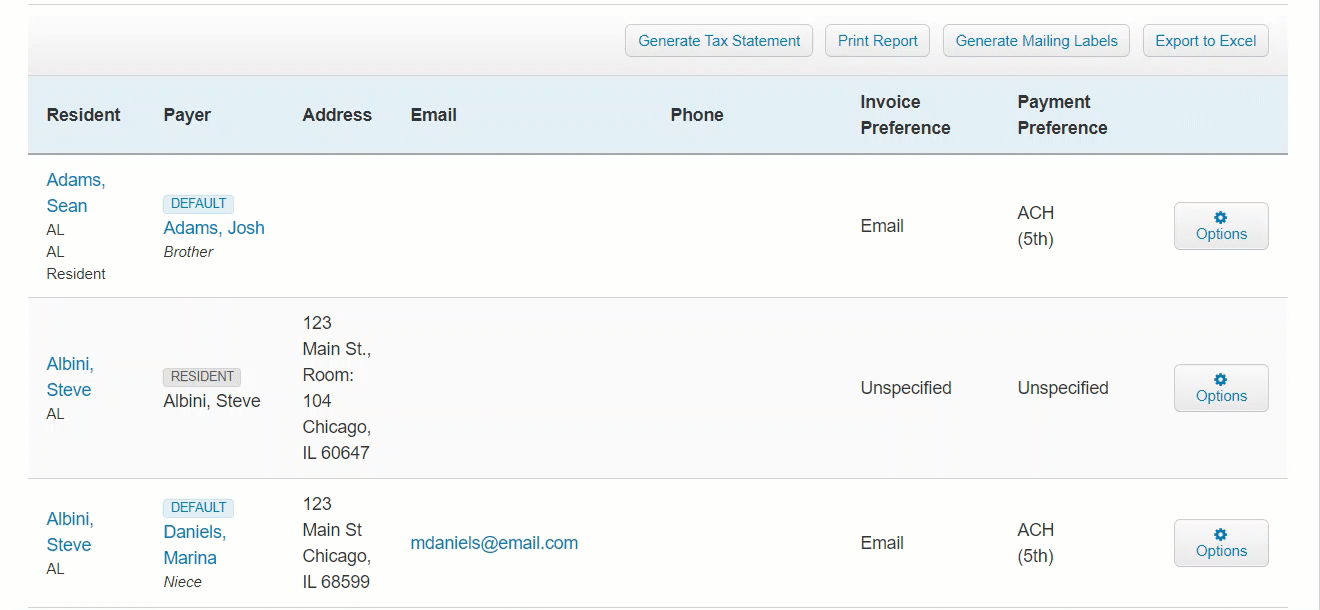
- Use the Payers report to show your list of residents and their default payers. If no setup has occurred, this will show all residents themselves as their own default payers.
- To add a new payer contact for a resident, follow the instructions to add a contact in this guide, and in the Payer Information section of the contact’s page, select the ‘Yes – Default’ option. Select an Invoice Preference.
- For all payers doing ACH, we need to update their information to include ACH or credit card details, as well as discern the date the transaction will run.
- Use the Options menu to the far right of your payer and select either Edit Contact for payers other than the resident, or Edit Payer Details for residents who are their own payer.
- Use the Options menu to the far right of your payer and select either Edit Contact for payers other than the resident, or Edit Payer Details for residents who are their own payer.
- This lands us on the Payer Information section. Select the Invoice Preference, set the Payment Preference to ACH or Credit Card, and select the Payment Date Preference (one of the dates from Step 1). Click Save.

- Scroll down to the Monthly Recurring Payment section. Here is where we will add the payer’s bank information required for the recurring ACH pull.
- Click +Add Payment Method, choose either Bank Account or Credit/Debit Card. In the pane, type the required details, including the billing address associated with the payment method. Click Add Payment Method to save this.
- We can Edit, Disable, and Delete any payment methods we add here.
- Click the button Enable Recurring Payment, and choose the payment method for future recurring payments.

3 – First ACH Pull
- After invoicing, we will record and submit the payments in the Payment Center.
- Start by clicking the button ACH/CC (not the smaller arrow button next to it). This will open a modal for you to select whether you are submitting ACH, credit card, or both types of payments.
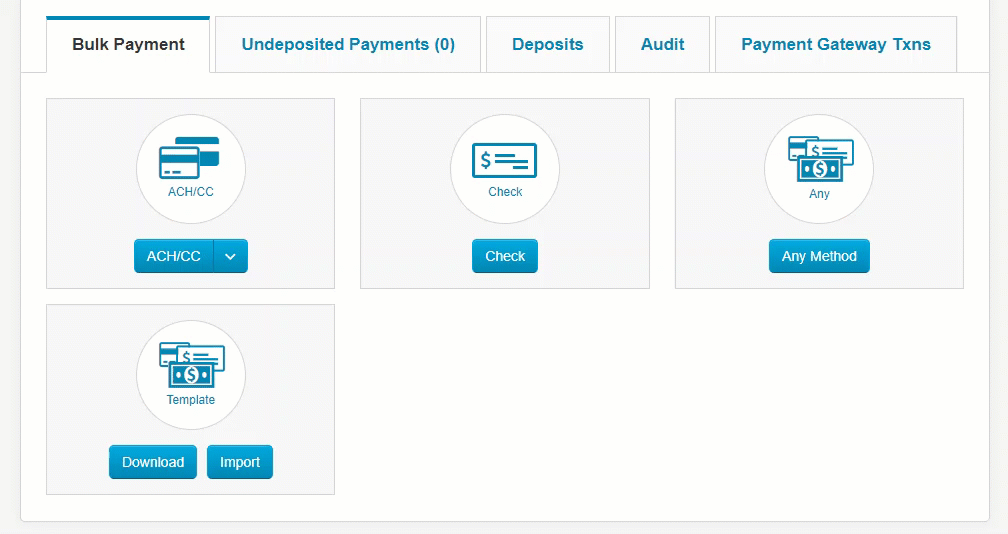
- The Payment Date Preference can be left as All unless you only want to run payments on specified dates. In order to have options in this menu, you must have different Payment Date Preferences specified for individual payers.
- If you haven’t used the Payment Center before or have questions, refer to this [link]bulk payment guide[/link] for more details. The amount you add to the payer accounts will be the amount withdrawn ACH. This will default to the payer’s outstanding balance, but you can edit this of course!
- Start by clicking the button ACH/CC (not the smaller arrow button next to it). This will open a modal for you to select whether you are submitting ACH, credit card, or both types of payments.
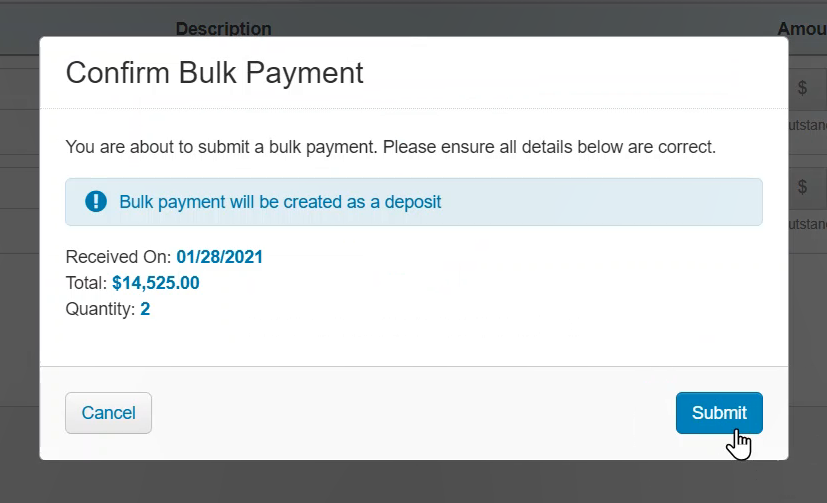
- Once you click Submit Payments, this makes the withdrawals and applies them to resident invoices.
- We will set up your accounting team with access to CardPointe, which allows you to see the status of your deposits. This is currently how you can refund or void the payments once submitted.
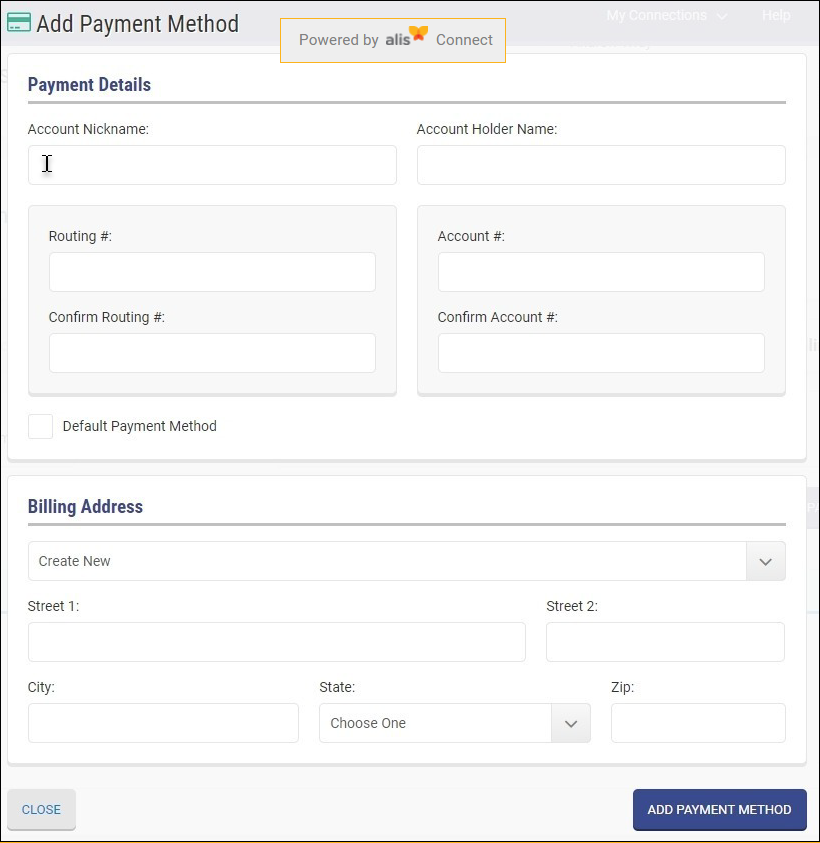
4 – Payments in ALIS Connect (optional)
The ALIS Connect portal allows the payers to add their payment details so that your billing administrator to do the ACH withdrawals, and for them to review invoices and complete payments on their own. It is necessary to communicate clearly with the payer to decide whether your billing team will run the payments or if the payer will process payments themselves.
It is necessary for your onboarding manager to enable ALIS Connect. Once they have it turned on, proceed!
- The first step is to get the payers set up in ALIS Connect. Manage ALIS Connect users in the Access tab of your ALIS Connect Center. This involves sending the payers email invitations to access the portal. [link]Read more details on setting up resident contacts in ALIS Connect here.[/link] These contacts need a level of access that allows them to view resident billing details.
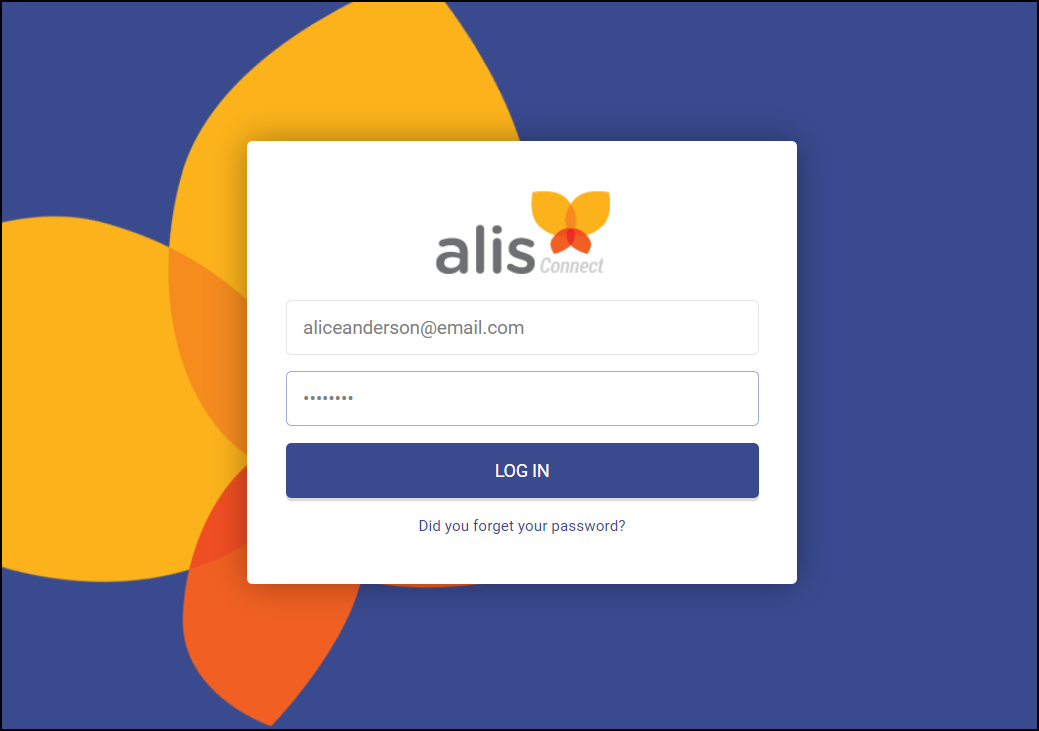
- Once the payer is logged into ALIS Connect, they can access the Billing section and click +Add Payment Method. Here they add their bank account or credit card information along with the relevant billing address, and you will be able to process payment in the payment center with these details following the steps described in section 3 above.
- Once again, ensure that you communicate with payer! They can pay on their own timeline using through ALIS Connect or you can complete the pulls in ALIS using the info they entered.
FAQ:
How much does it cost?
What are the most common errors?
- Missing or bad account numbers. We can use a tool in ALIS to update records.
- Errors with authenticating the provided credentials from Intacct. This is often because the account password or status was changed.
Can I terminate my account without being penalized?
- The agreement states under section 12 there is a 3 year term but there are no termination fees. The agreement also states in section 5.1 the only fees and penalties that can be assessed are on the fee schedule. There are no ETF fees on the fee schedule. We do not have a term limit set on our ProfitStars accounts. If the merchant were to apply and be approved on a Monday and then they wanted to cancel on that same Friday that’s fine.