ALIS Survey Guide
Don’t panic – the information is at your fingertips!
Prep Work:
- Create a clear policy that states what items are included in a resident’s ALIS chart. Not everything recorded in ALIS needs to be viewed by a surveyor! A policy helps prevent exposing informal notes and charting details.
- Document your process. Include who should be notified immediately, where the state person should work, what computer they should use (if applicable), how to give them access to ALIS (if applicable), and how to print most commonly asked-for items.
Day of State’s Arrival:
Our recommendation is to not give a state surveyor access to ALIS. Our recommendation is to respond to the state’s requests by printing out the information requested by the surveyor. That said, we can absolutely accommodate giving the surveyor a security role which will limit them to view only items they need.
Make sure a community representative is present with surveyor to print or provide copies as needed.
ALIS offers unlimited surveyor support! Please contact your ALIS onboarding team or the ALIS support team for help during your survey. Email support@medtelligent.com or call 888.404.ALIS (2547).
Setting up Surveyor’s Role in ALIS:
If it is necessary to give a state surveyor access to ALIS, this can be done by restricting the permissions of a new user login. Most likely this can be done the quickest by contacting ALIS Support using the above email and phone number. We will create for you a staff member username and password, and assign to them a “Surveyor” security role.
Printing information from ALIS
Printing Nurse’s Notes (Observation Center)
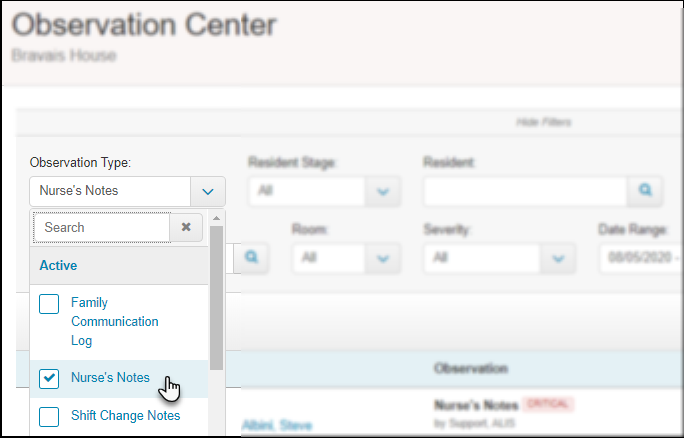
- Use the filters in the Observation Center to display the information you need.
- Use the Observation Type filter to select Nurse’s Notes.
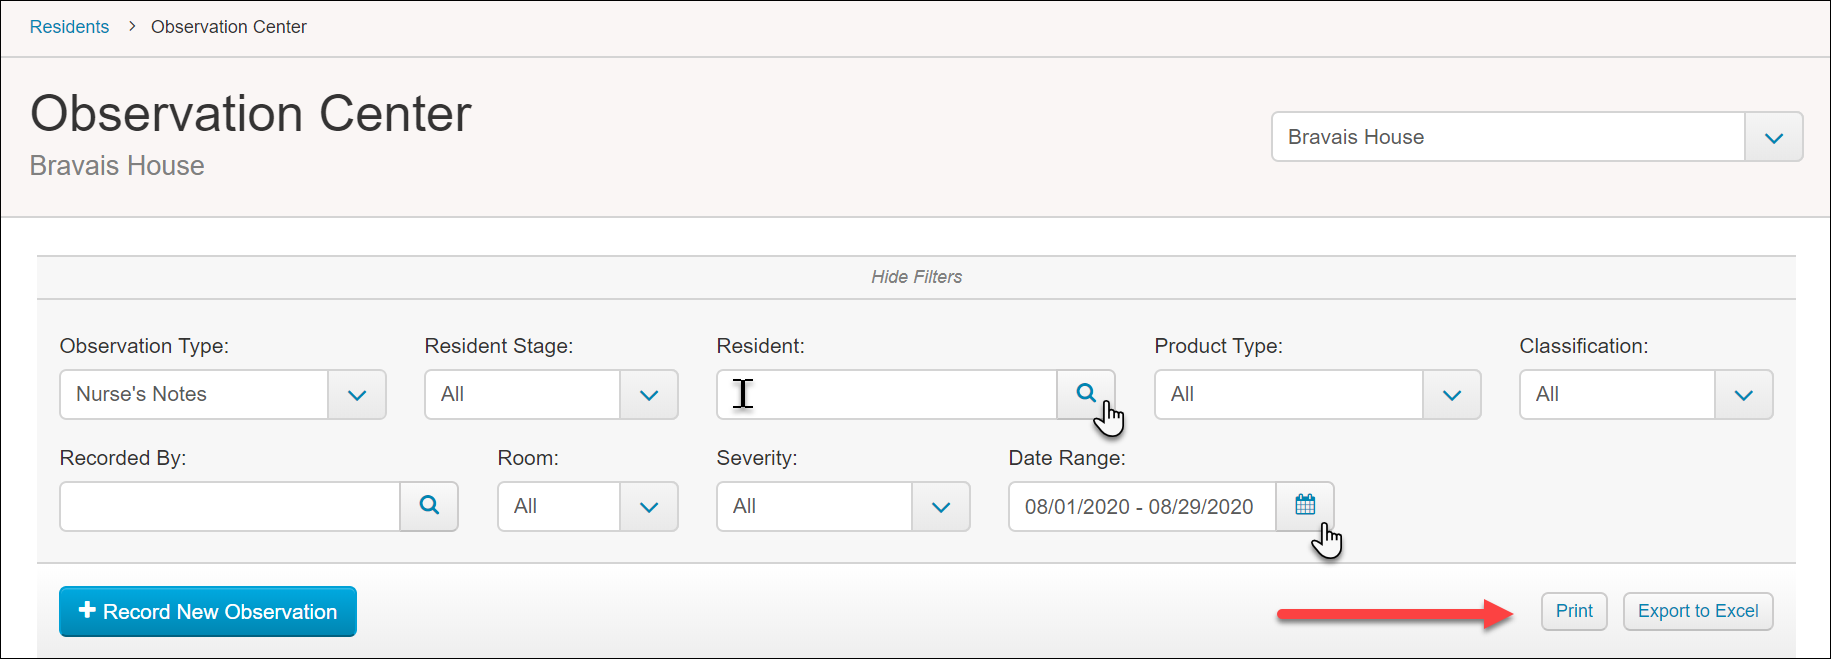
- To narrow the search to only one resident, begin typing their name in the Resident filter and click on it. Click the magnifying glass button. Skip this step if you want to print notes for all residents.f
- Use the date range filter to look at the notes for a specific length of time.
- Use the Observation Type filter to select Nurse’s Notes.
- When you have the filters set, verify the correct notes are displaying in the table below, and click the Print button located on the right below the filters and above the notes.
Printing Physician Orders
For One Resident:
- To find the Physician’s Orders document for one resident, access the resident’s Manage Orders page. There are a few ways to get there:
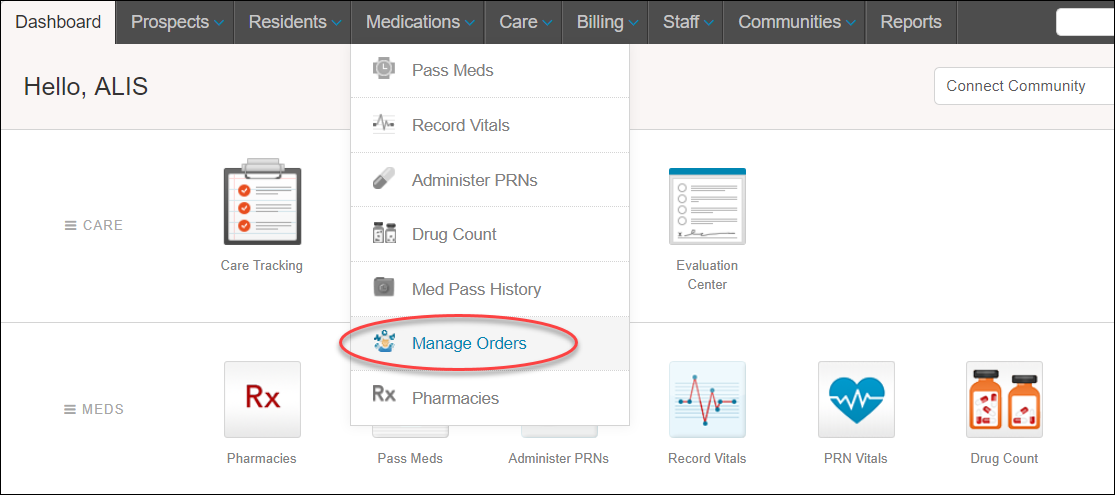
- Click the Medications menu at the top of the screen, and select Manage Orders. On this page, use the ‘Choose resident to manage’ menu to search for the resident’s name, then click Manage Orders.
- Go to the Resident’s Profile, and click the Manage Orders button below their photo.
- Click the Medications menu at the top of the screen, and select Manage Orders. On this page, use the ‘Choose resident to manage’ menu to search for the resident’s name, then click Manage Orders.
- On the Manage orders page, click the button Physician Orders and click Current Orders. This generates a PDF document that can be viewed and printed.
For All Residents:
- Click the Medications menu at the top of the screen, and select Manage Orders.
- In the buttons on the left of the page, use the small arrow button next to the Print All Physician Orders button to expose and click the Print Current Physicians Orders button. This generates a PDF document that can be viewed and printed.

Printing MARs
For One Resident:
- Go to the Resident’s Profile page or the resident’s Manage Orders page. From their Resident Profile, click the Current MAR button below their photo. From their Manage Orders page, click the blue Current MAR button.
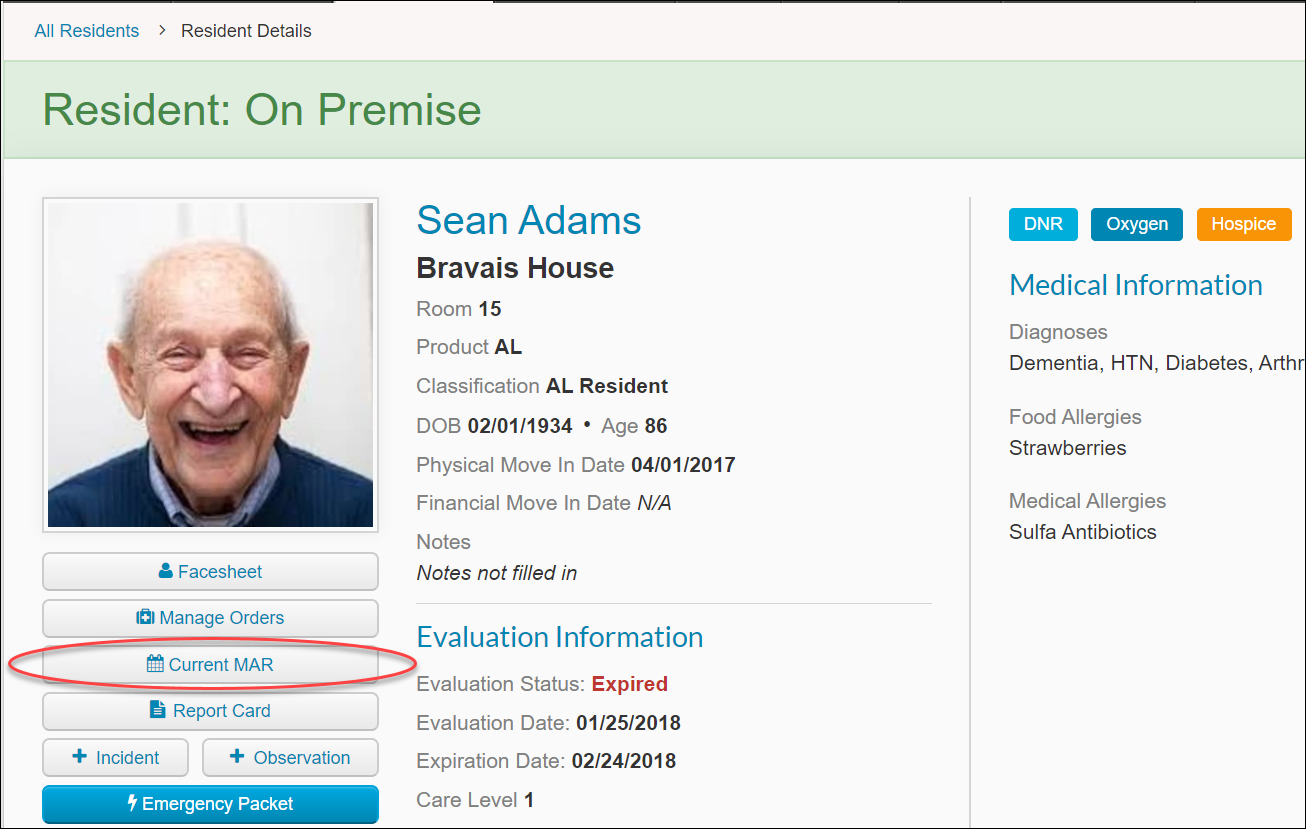
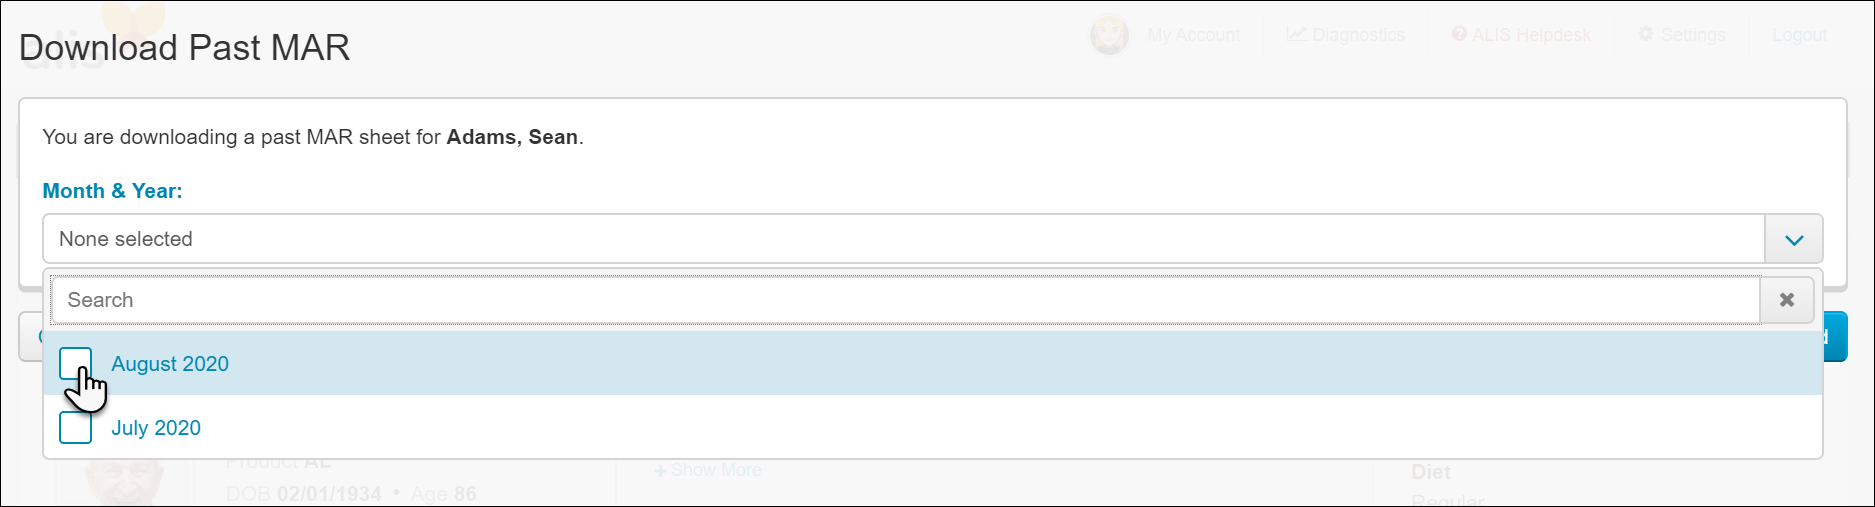
- To find historic MARs for a resident, go to their Manage Orders page. Click the Past MARs button second from the left, and use the pop-up menu to select the months and years you need.
For All Residents:
- Click the Medications menu at the top of the screen, and select Manage Orders.
- In the buttons on the left of the page, use the small arrow button next to the Print Blank MAR Sheets button to expose and click the Print Community MAR Sheets button. This generates a PDF document that can be viewed and printed.

Printing Advance Directive or DNR status
The resident’s Advance Directive status tag displays on their Resident Profile page, on the Manage Orders, Pass Meds, as well as most other parts of ALIS. This tag displays on the ALIS Face Sheets, Physician Orders, MARs, Evaluations, and Care Plan documents.
To print the Advance Directive status tag for All Residents:
- Advance Directive status is captured on several Resident reports, including the Resident Roster and the Resident Checklist.
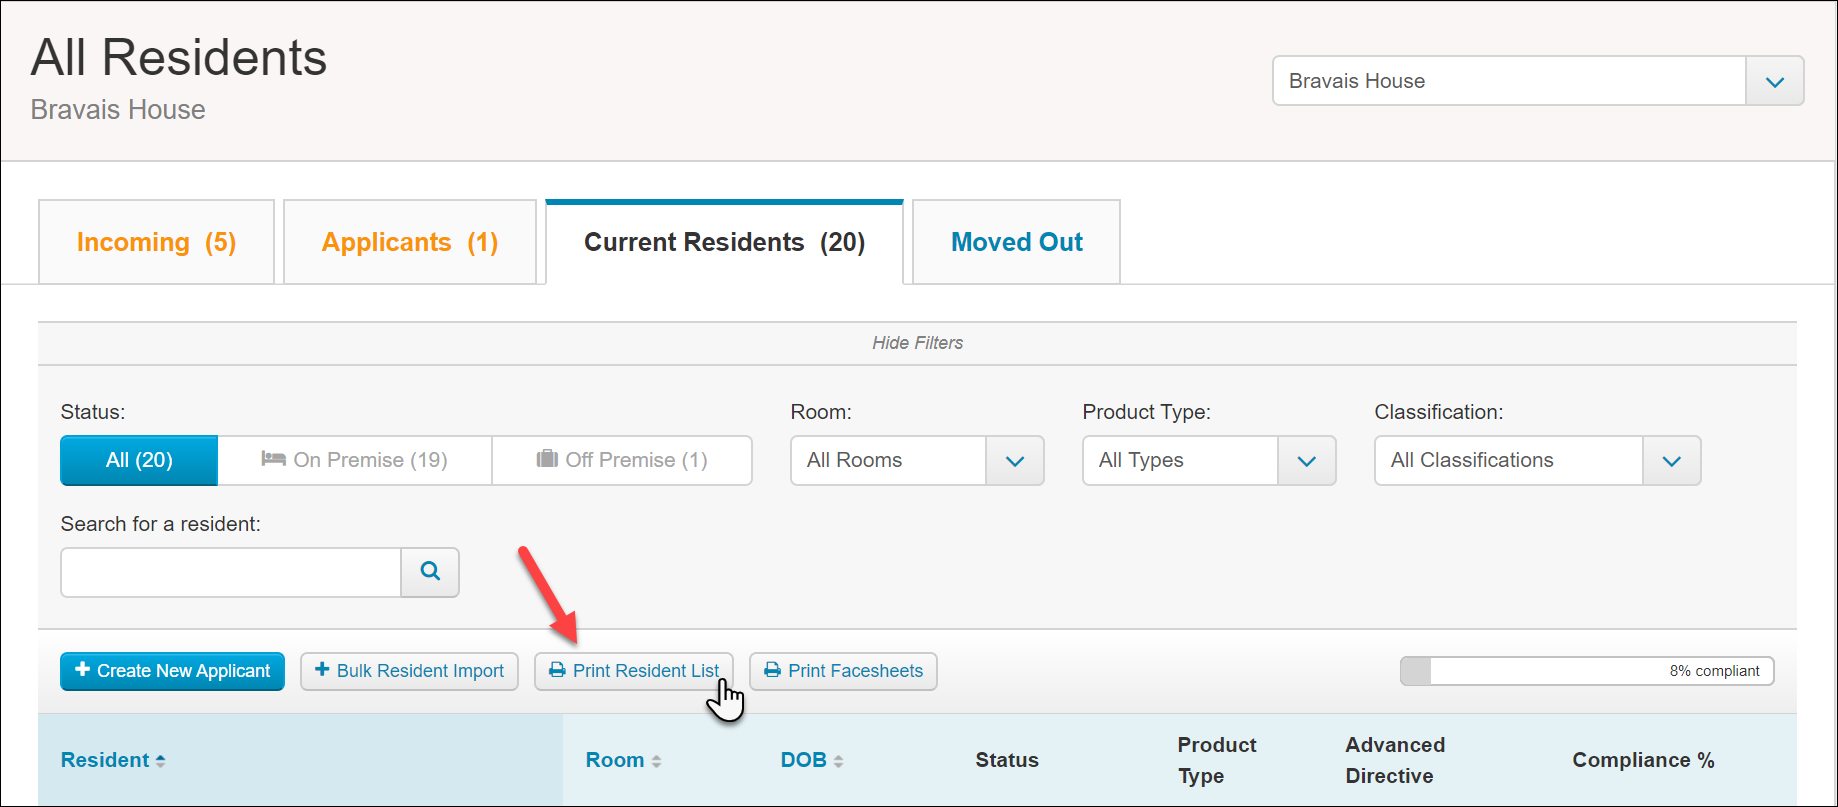
- The easiest way to print out the Advanced Directives is to visit the All Residents page. When you land on this page, the Current Residents is in focus. Click the Print Resident List button near the middle of the page above the list of residents. When you click this, a printable PDF document generates to show you a handful of useful details regarding the resident’s status, the second column from the right being the Advance Directive status.
If you are maintaining an Advance Directive document in the resident’s Compliance Documents, the easiest way to export this either from the Compliance section of the resident profile (click the link in the File Location column for this item). 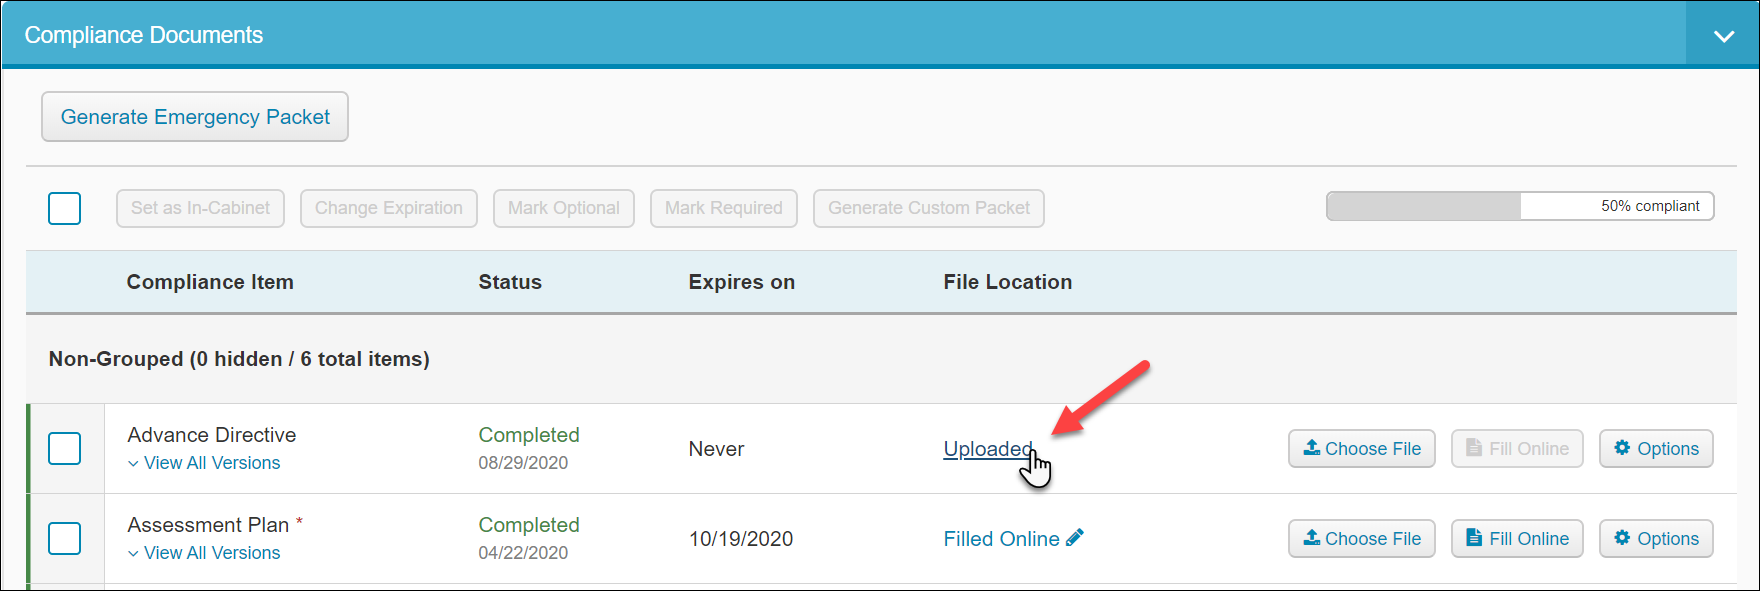
To print a compliance item for all residents, use the Resident Compliance Details report. In the Reports page, find the Resident Reports section and click Compliance Details. Here we can use the Compliance Item filter to find the Advance Directive item, click the blue Refresh button, then use the Print Compliance Documents button to download a folder of all documents onto your computer for viewing or printing. 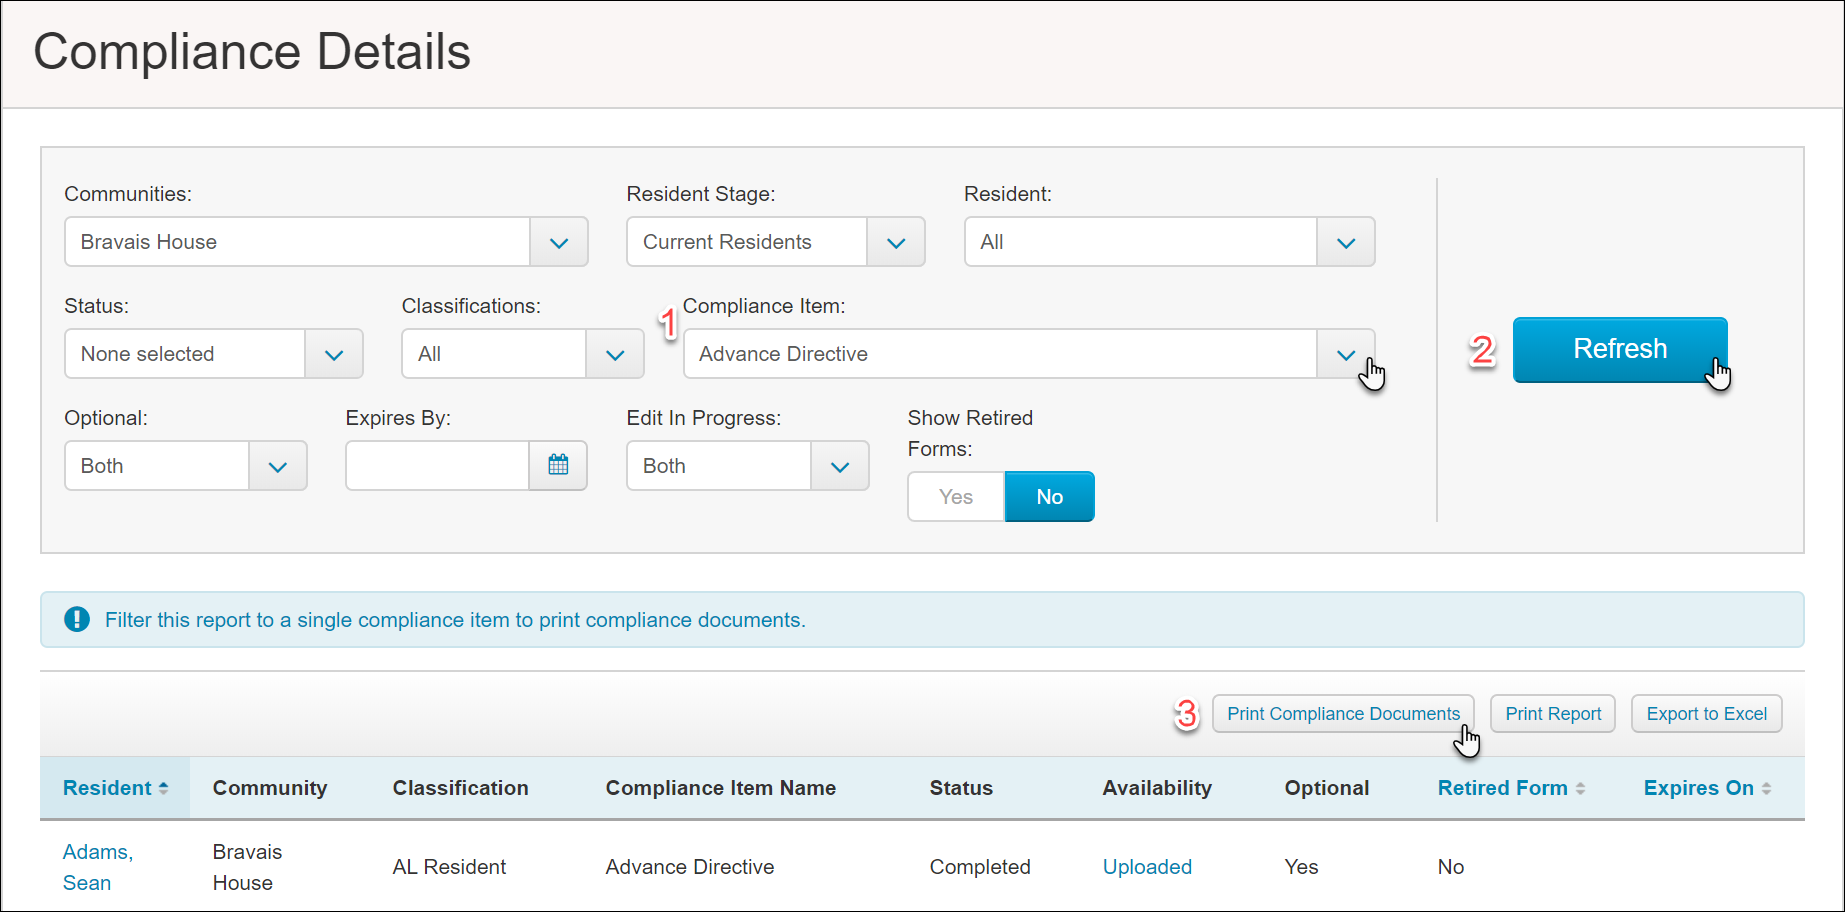
Printing ALIS Facesheets
For one resident, go to the Resident’s Profile page and click the Facesheet button under the resident photo. This generates a PDF that can be viewed and printed.
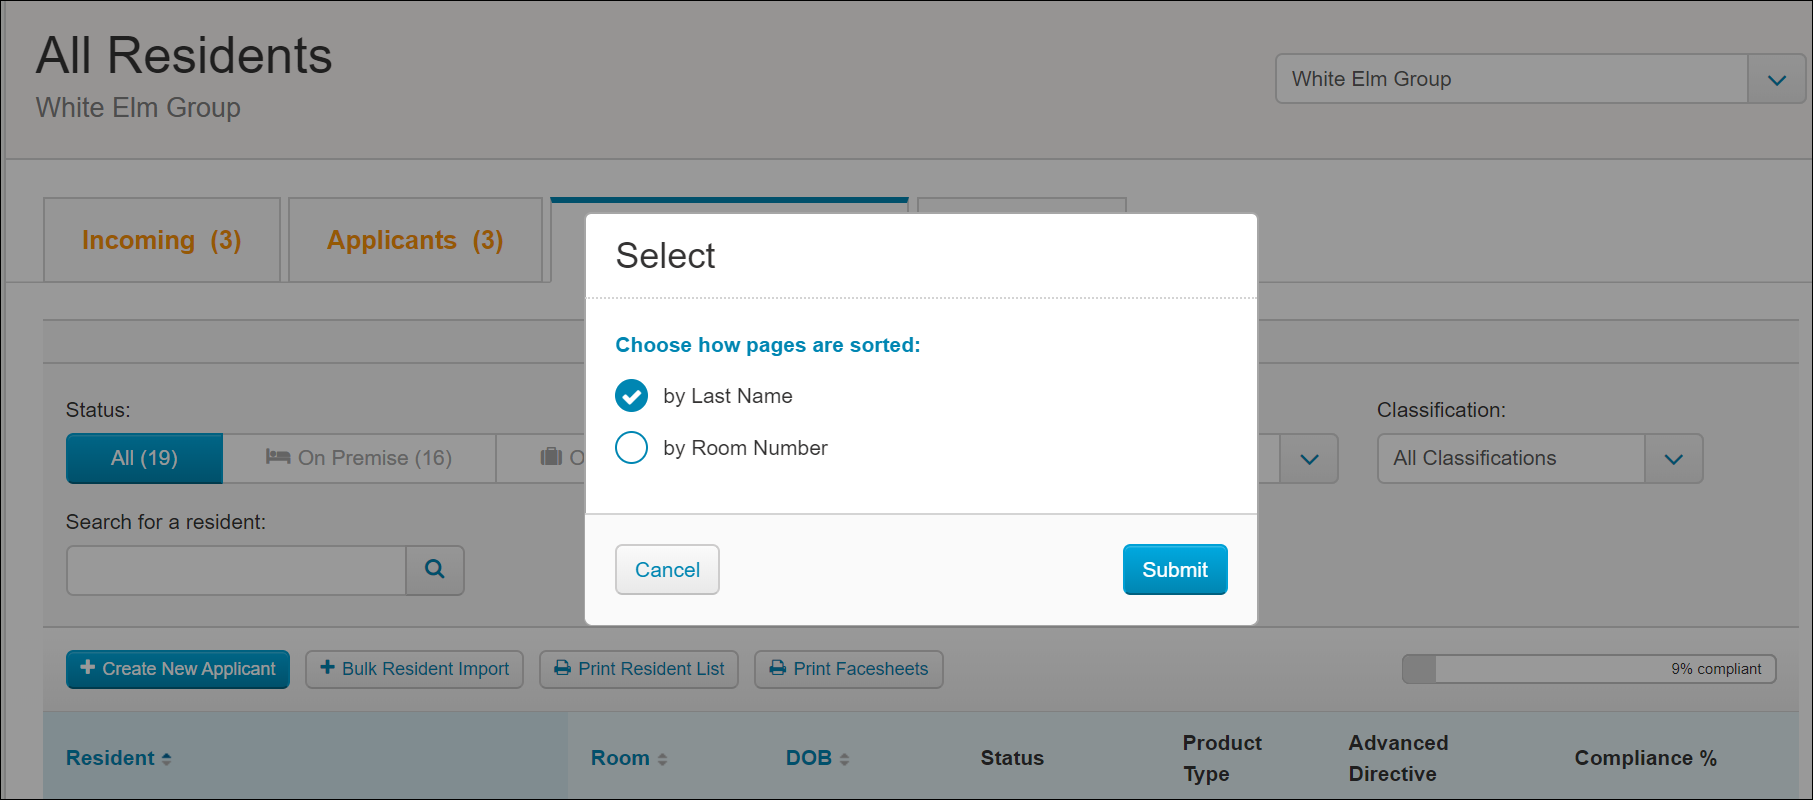
For All Residents, go to the All Residents page. Here we can click the Print Facesheets button toward the middle of the screen above the resident list. When you click this, a pop-up will ask if you want the document of all Facesheets sorted by Last Name or Room Number. Once you click Submit, a printable PDF document including all the Facesheets will generate.
To print a compliance item for all residents, use the Resident Compliance Details report. In the Reports page, find the Resident Reports section and click Compliance Details. Here we can use the Compliance Item filter to find the Facesheet item, click the blue Refresh button, then use the Print Compliance Documents button to download a folder of all documents onto your computer for viewing or printing.
Printing Vitals Records
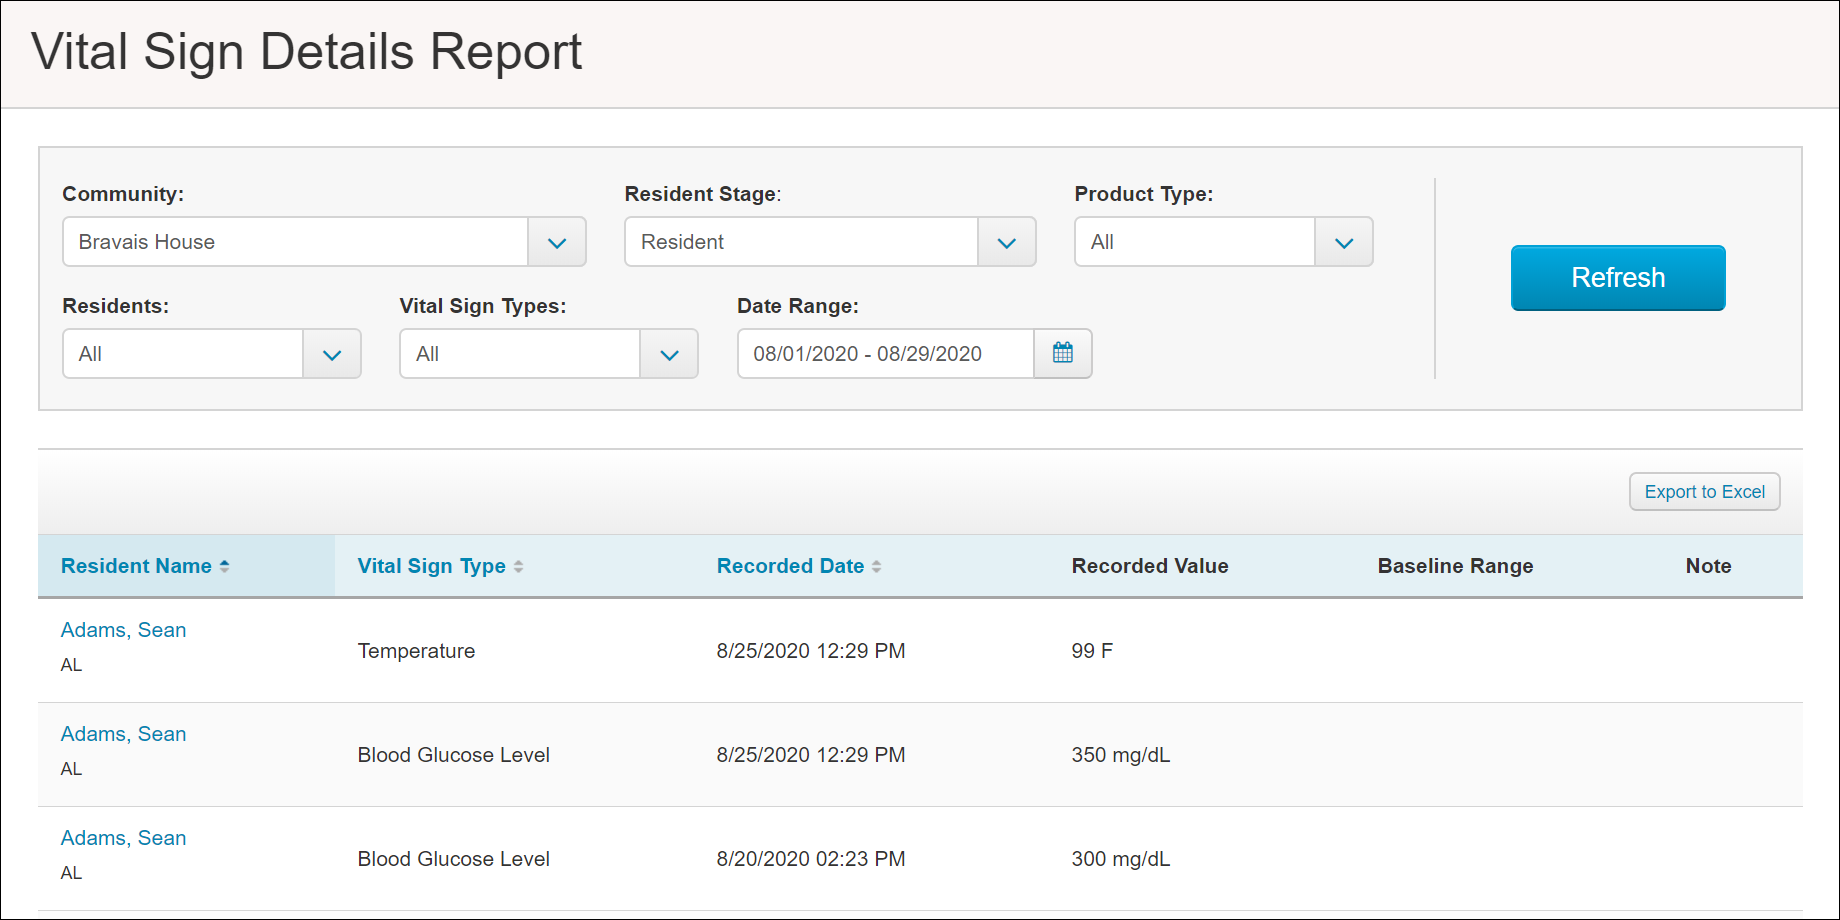
There are two reports we can use to print Vitals data. Most of the time, the Vital Sign Details report will show us everything we need.
- Go to Reports, find the Resident Reports section, and click Vital Sign Details.
- By default, this will show us the list of all vitals recorded for all residents this month to date. Use the filters to select specific residents, Vital Sign Types, and a Date Range. Click the Refresh button.
- Verify the vitals records you need are in the table below, and click Export to Excel to view these outside of ALIS.
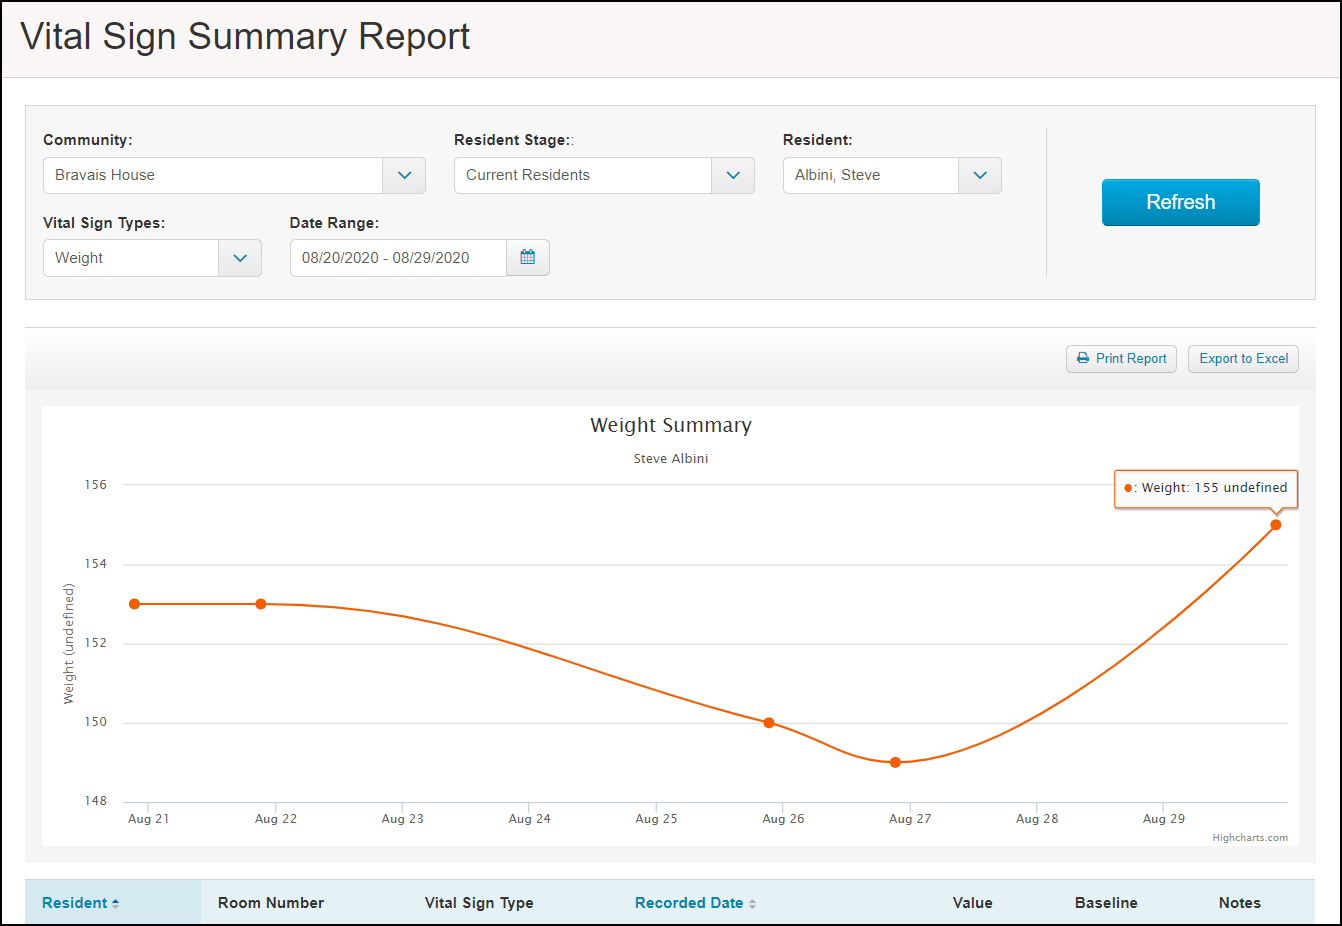
Use the Vital Sign Summary Report to display a single vital type for one resident. This displays a line graph as well, and is printer friendly.
Printing Service Plans
The Evaluation Center is the easiest way to find the Service Plans documents. You can also do this in the Evaluations and Service Plans section of the Resident Profile.
- Click the All Residents tab, fourth from the left.
- Scroll to find your resident, or use the filter menus at the top to find the resident you are looking for.
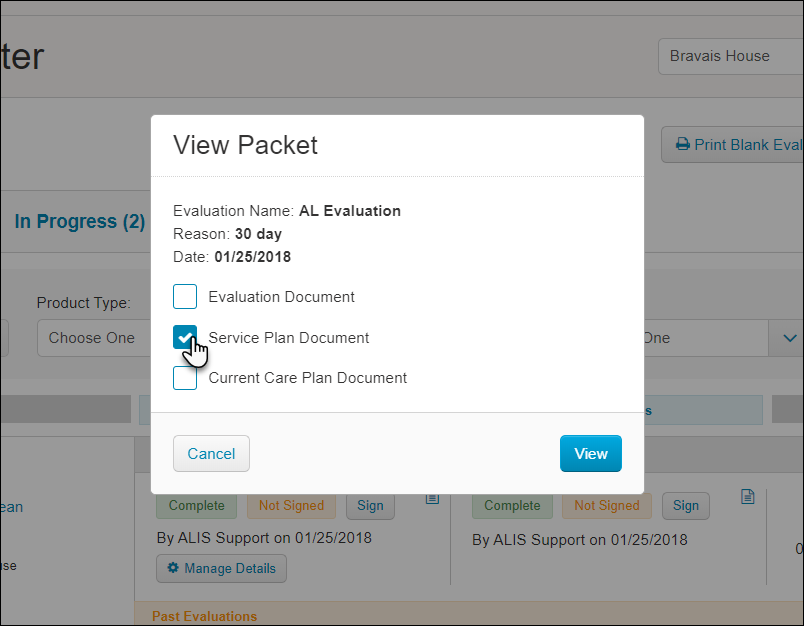
- Click on either of the the small icons that look like a piece of paper. This will create a pop-up to ask which documents you want to view for the resident.
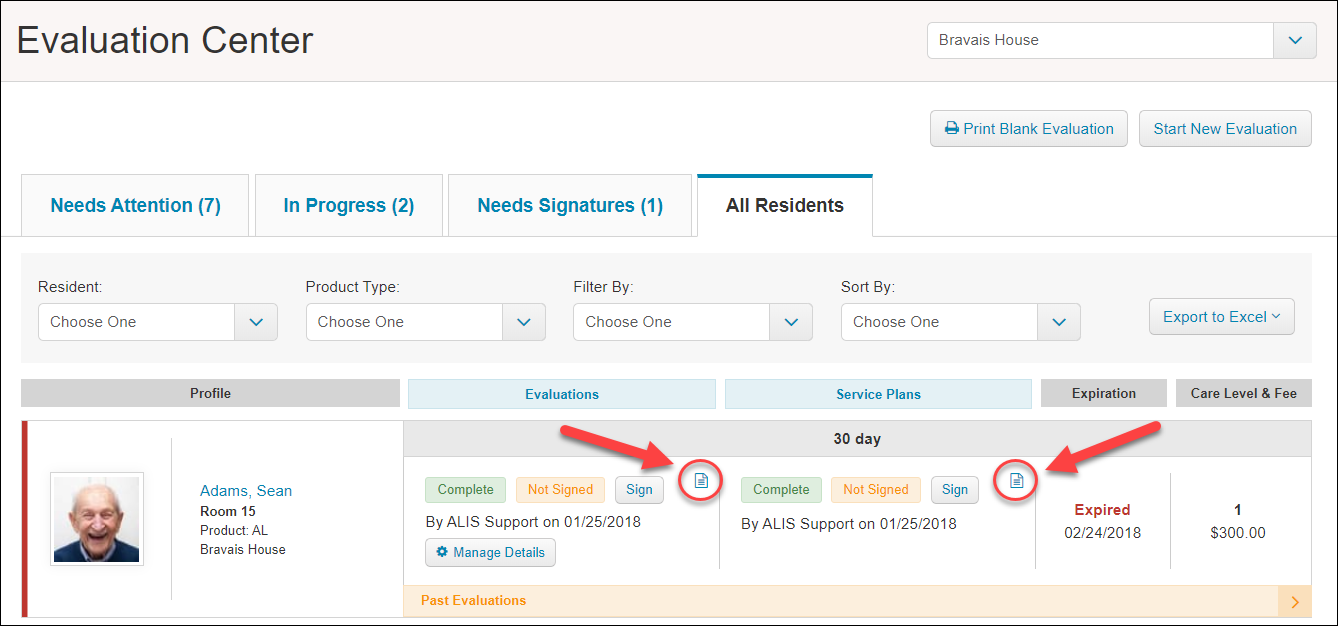
- Select the items you want to view. This will generate a PDF for viewing and printing.
Printing Care Plans
There are several ways to access Care Plans as PDFs. Listed here are some of the easiest ways!
For an individual resident, the easiest way is to go to their Resident Profile and open the Care Plan section about halfway down the page. Click the Download Care Plan button to open a PDF for viewing and printing. 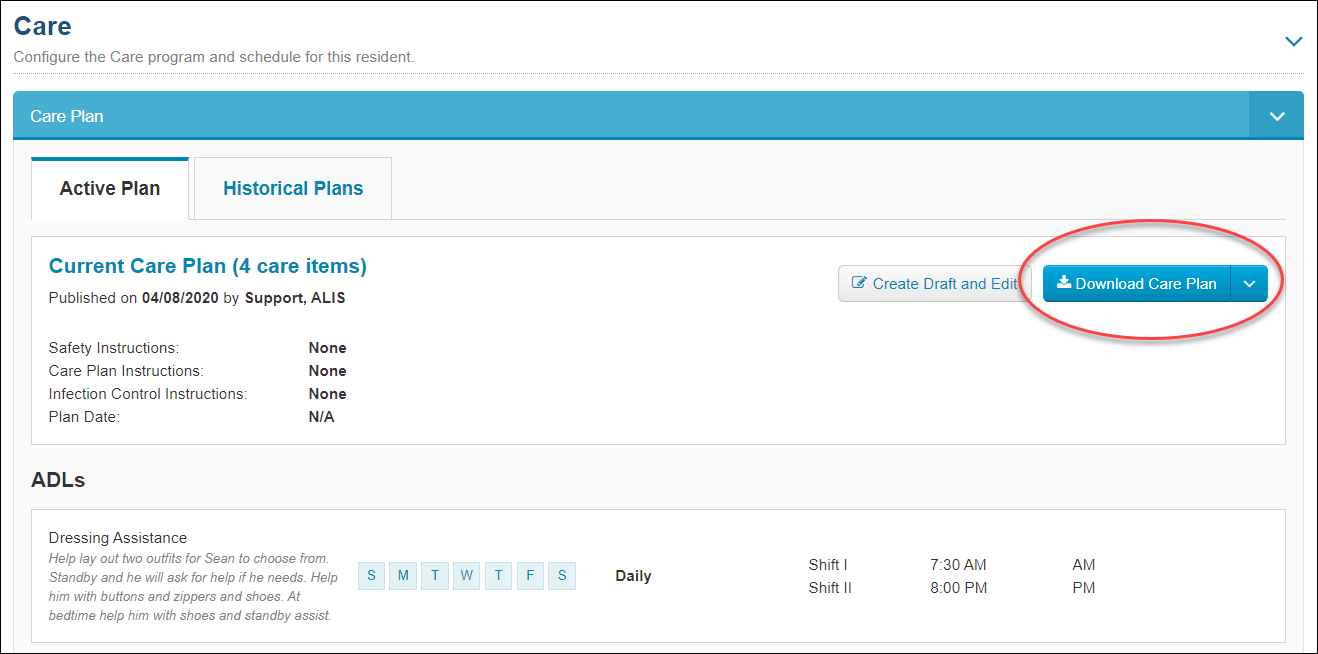
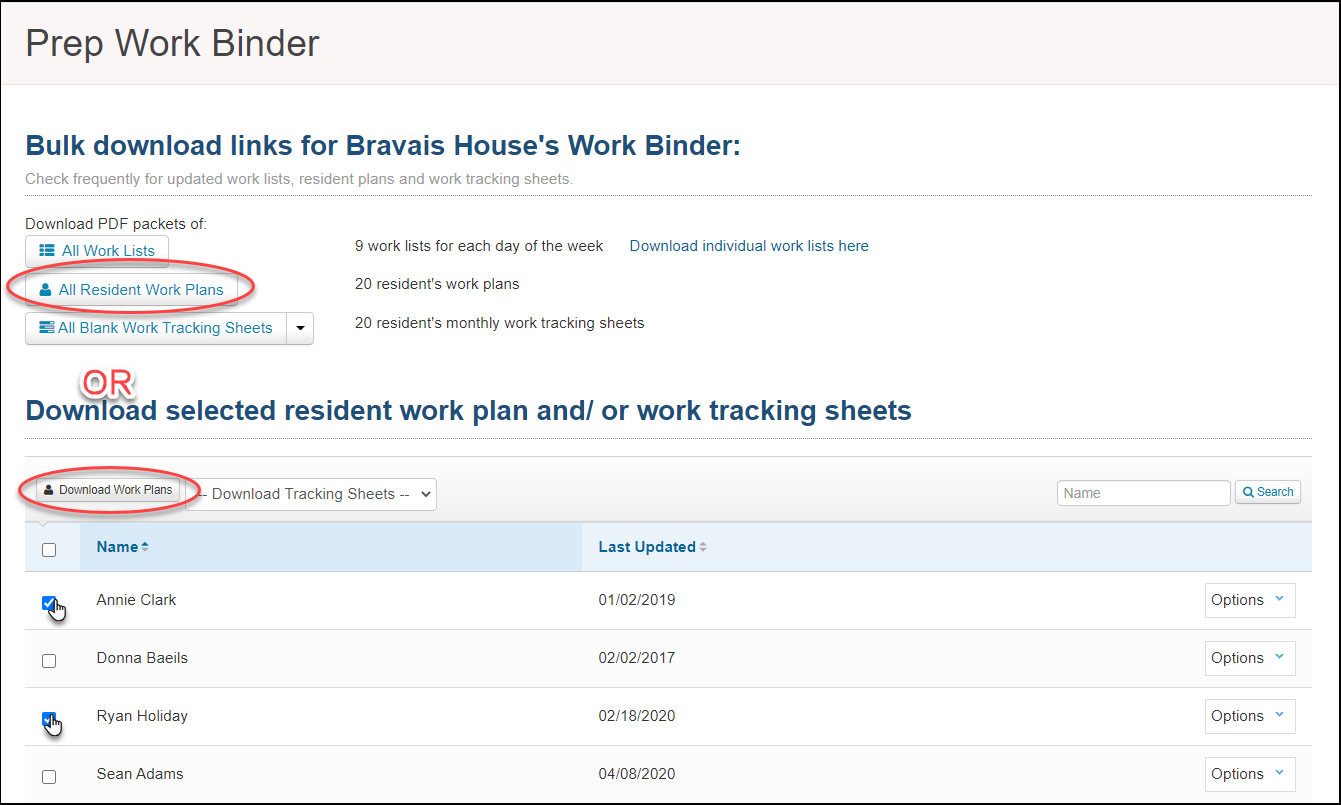
To print the care lists for all or multiple residents, use the Work Lists page.
- Using the Care menu at the top of the page, click Work Lists.
- Click the Prep work binder for this community button, selecting the All work lists button.
- From the Prep Work Binder page, click All Resident Work Plans for a PDF of all resident Care Plans.
- To generate a PDF of multiple residents’ Care Plans, use the table below to select the checkboxes to the left of the names, then click the Download Work Plans button.