
Bulk Add Residents to ALIS
The ability to add multiple residents at a time is useful when you are just getting started with ALIS or if you are on-boarding new communities. If you are adding only one resident, the Create New Applicant workflow remains most appropriate method.
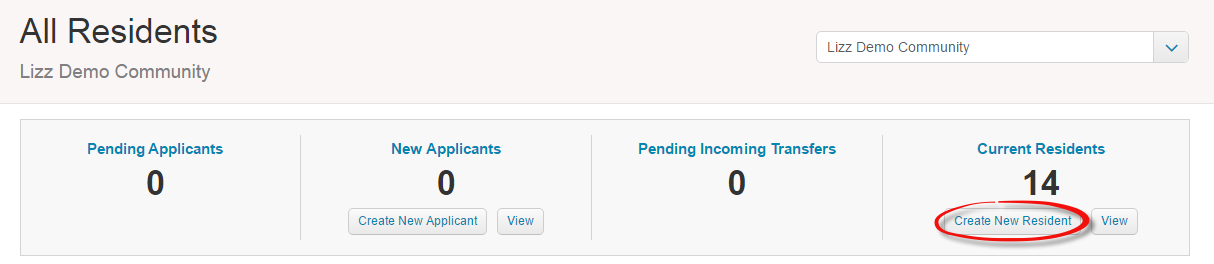
- To get started with adding several residents at a time, click the Create New Resident on the All Residents page.
- It is recommended that if you are adding only a handful of residents that you use the ALIS on-screen add residents table. This table is found on the Add Residents page, and you will not need to view any further screens if you work this way. Simply fill in the blanks on the scrolling table, and all required fields will be indicated by red help text. Once all required fields have been fulfilled, the Add Residents button at the bottom right of the screen will become available. Easy!
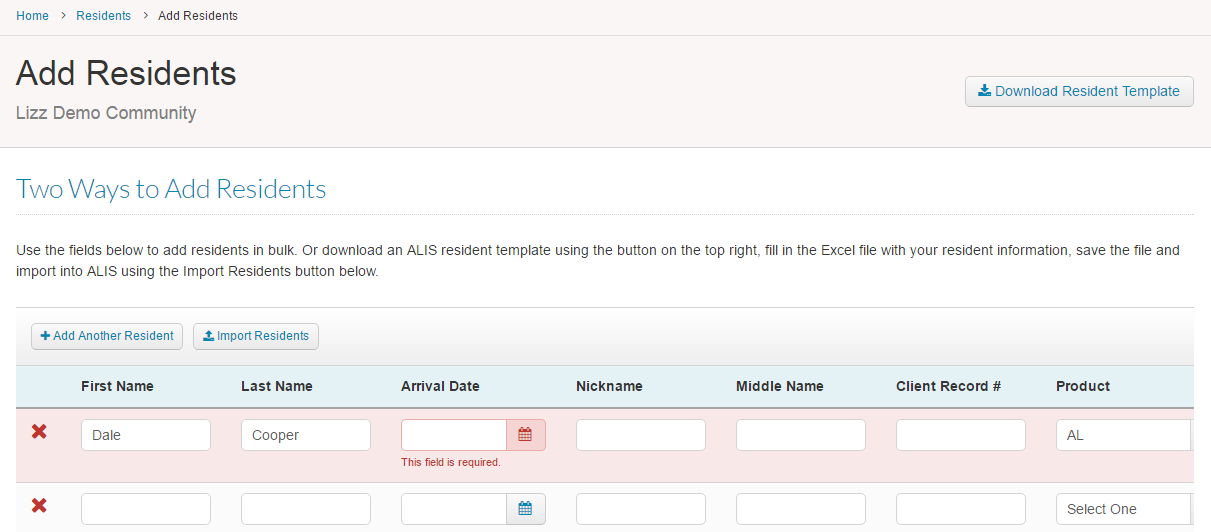 Note: The +Add Another Resident buttons located above and below this table will add or remove rows as needed. Also, the red Xs to the far left of the rows will delete the rows. There is no need to delete rows containing no data in order to move forward.
- For adding more than 10 residents, it is recommended that you use the ALIS Import Template. Click the Download Resident Template button at the top right of the Add Residents screen to download the Excel file into which you will be inputting data. This will allow you to circulate the file easily between users if necessary and to work on intervallically. This also prevents you from losing data that has been entered if the ALIS screen logs you out.
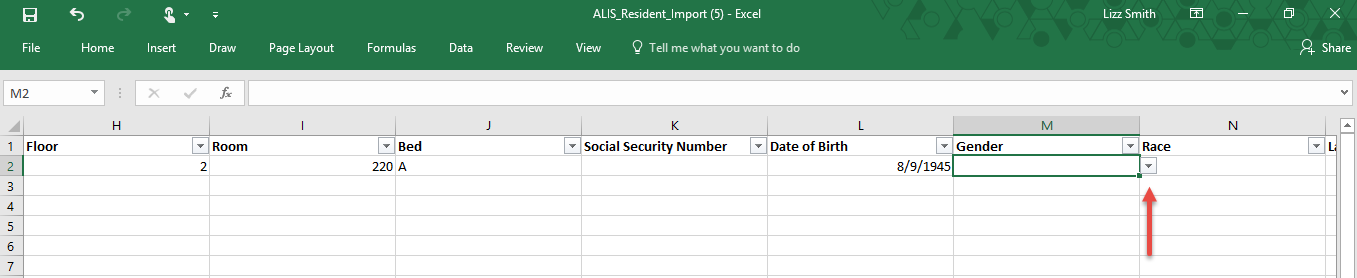
- Once the Excel file titled “ALIS_Resident_Import” has been downloaded onto your machine, open it and begin adding details about the residents. For those columns in which there are limited options, an arrow will appear to the right of a cell once it is selected. Clicking this arrow will give you a dropdown from which to choose an option. If you add information not captured by the dropdown into cells under this type of column, the entry will be flagged when it is imported into ALIS and must be corrected before moving forward.
- Once you have finished filling out and save the Excel file, click the Import Residents above the table on the Add Residents screen and select the file. This will push all data entered into Excel onto the add residents table. Update any fields that are flagged as required or incompatible until the Add Residents button is available at the bottom right of the screen.
- Click the Add Residents button and all of the data you entered will become ALIS Resident Profiles!